Sheet Pan Catfish Dinner

SheetPan_angle.jpeg

*sponsored post

When time is tight and I just don’t feel like stirring and sautéing my way to dinner—and I really don’t feel like washing pots and pans—thank goodness I can rely on a good sheet pan dinner. Everything cooks together on a lined sheet pan (that I don’t have to wash), and I bring that pan out to the table as the “platter” we serve ourselves from. It feels fun and casual, and I feel good knowing that, even with minimal effort, I’ve put a healthy dinner on the table for my family. 

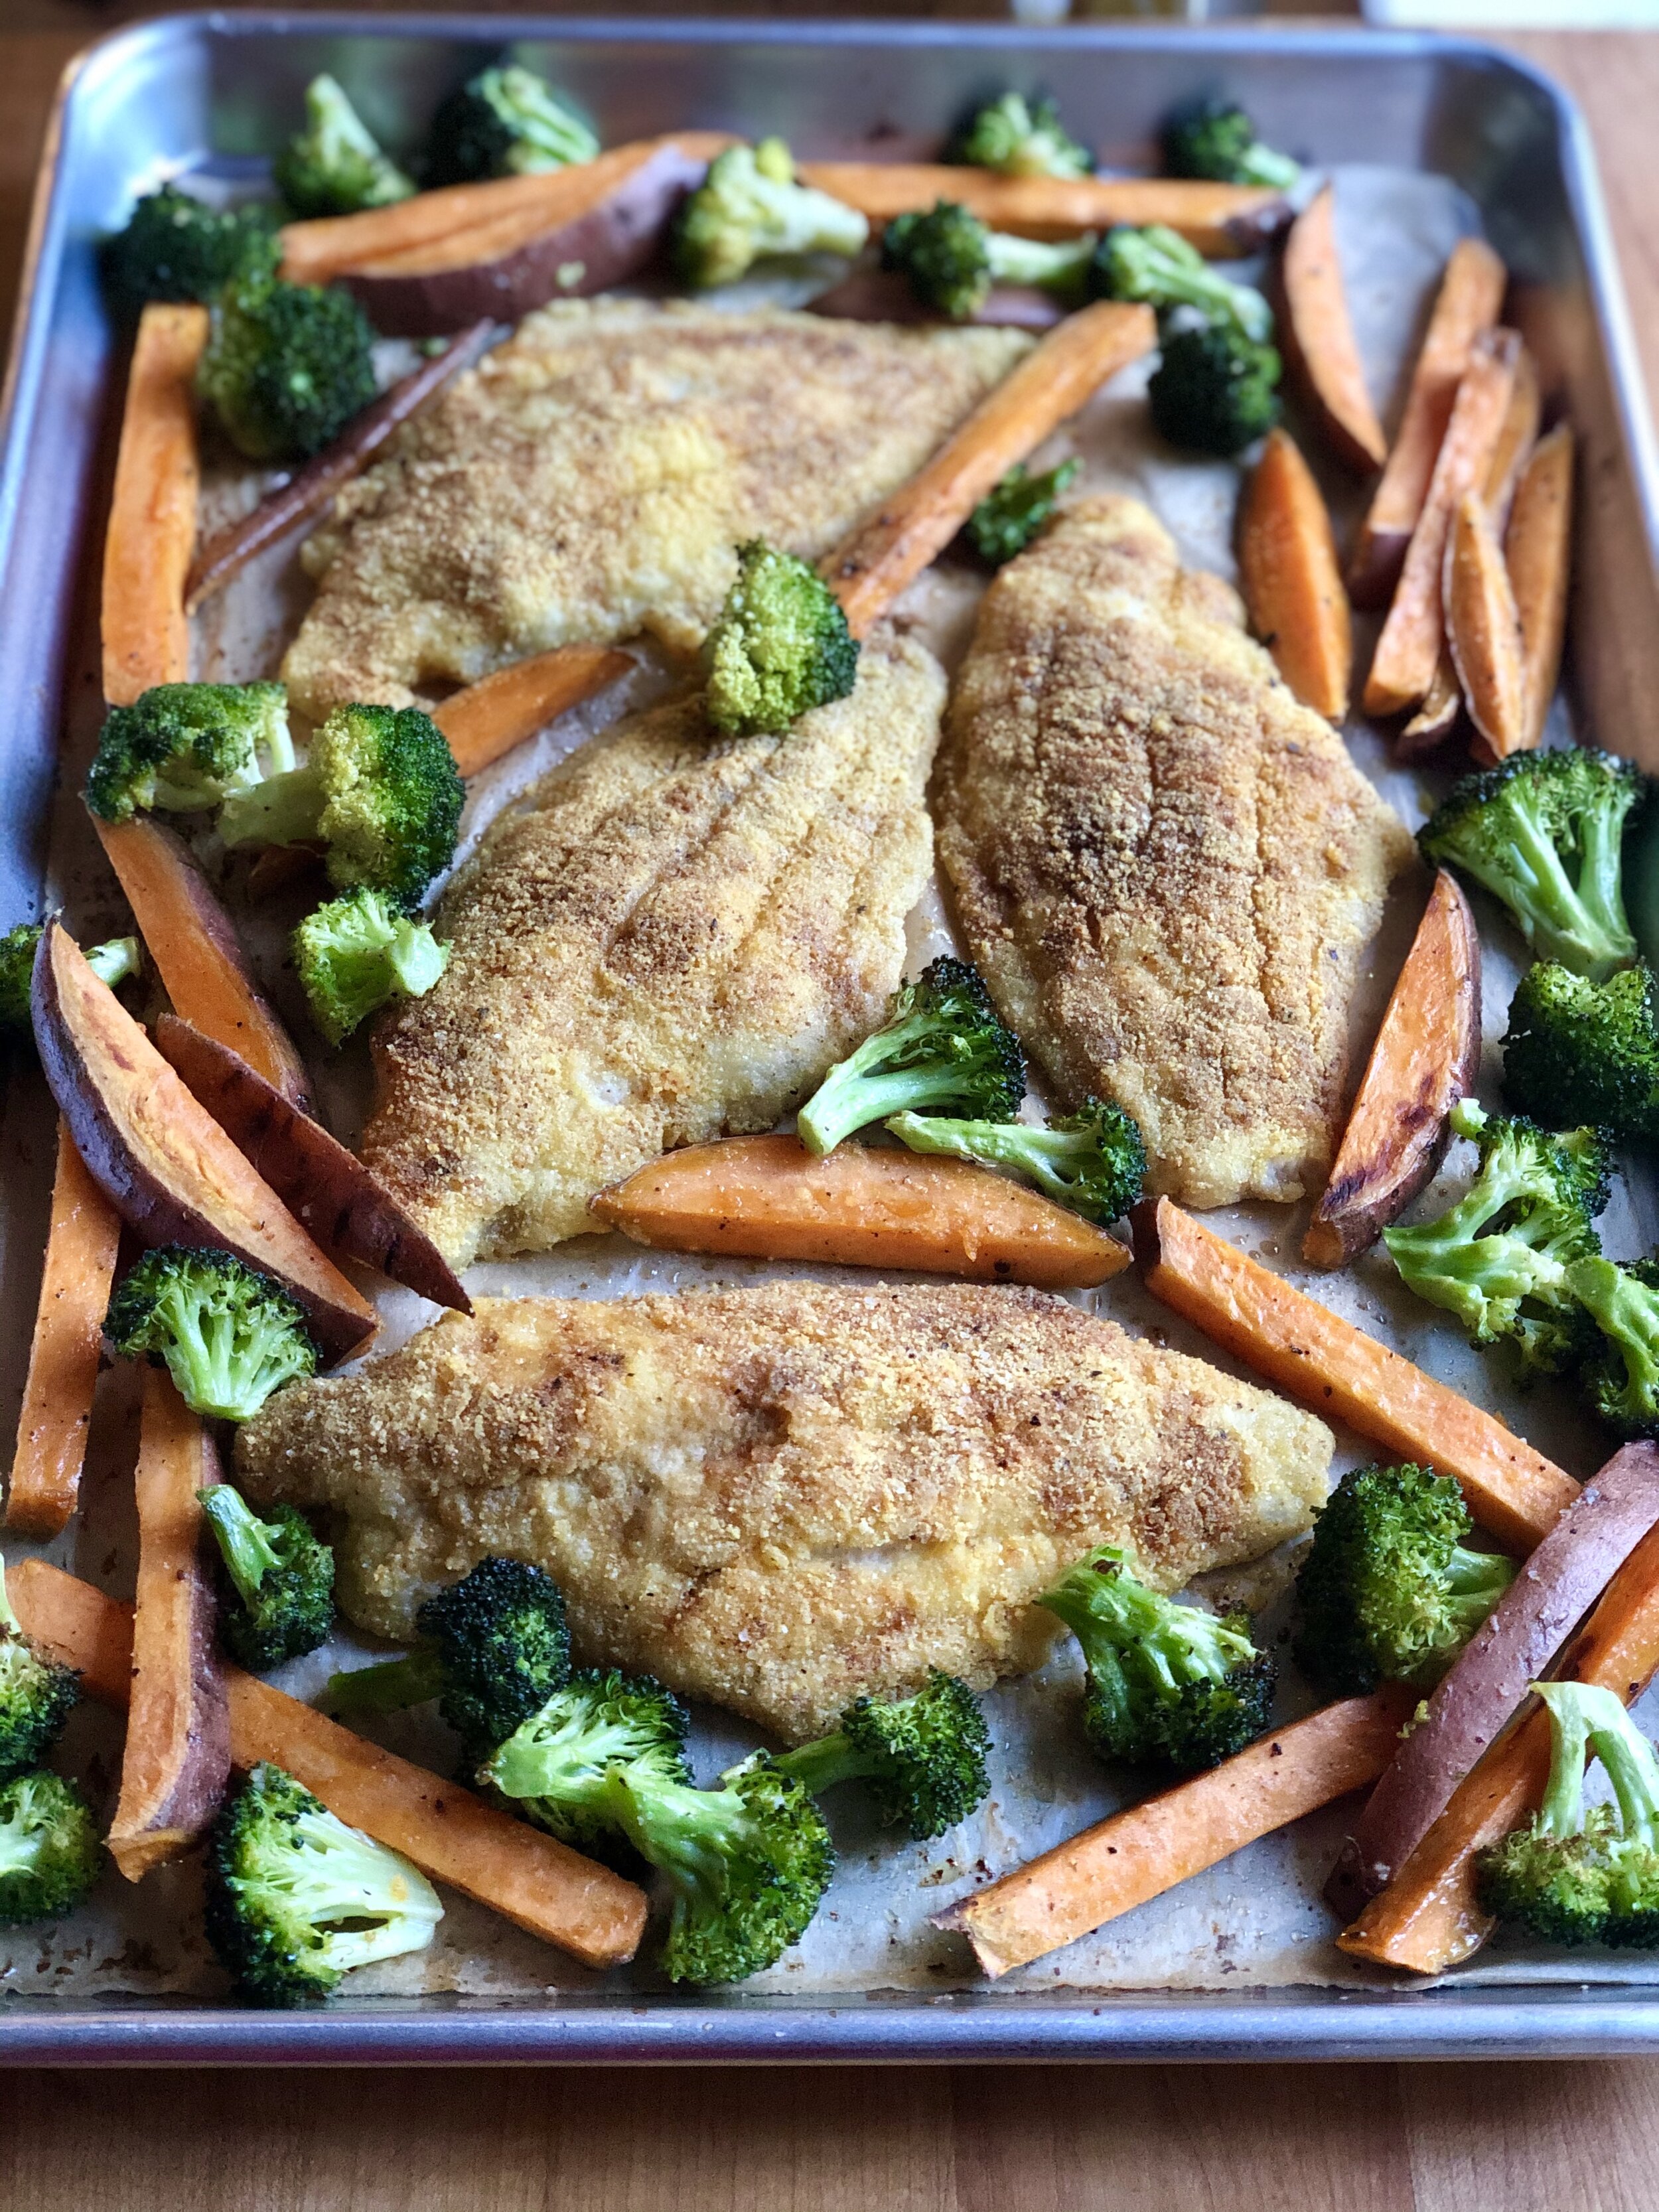
I created this Sheet Pan Catfish Dinner because I knew it would be a surefire hit with my family, boasting our favorite veggies, our most-loved fish, and a lovely assortment of textures. Sweet potato “fries” get a head start on cooking so that they’ll be buttery tender inside, with some caramelized crunchy bits outside. The broccoli goes on later so that it ends up with a crisp-tender texture and some frizzled parts, too. But the real star of this dinner is the oven-fried catfish. It bakes up crispy on the outside, moist and tender on the inside, and perfectly seasoned bite after bite. And, with U.S. Farm-Raised Catfish, I know the flavor will be reliably mild and buttery, and the fish will be sustainably raised. It’s a dinner that makes me feel good for so many reasons.

Yield: 4 servings (serving size: 1 catfish fillet and about 1 cup vegetables)
Author:

Sheet Pan Catfish Dinner

prep time: 10 Mcook time: 25 Mtotal time: 35 M
They key to this dinner is to add the food in stages—the sweet potatoes take the longest to cook, so they go into the oven first. Then, after a few minutes, you add the breaded catfish and broccoli florets. At the end, you get tender potatoes, moist fish, and crisp-frizzled broccoli. I like to brush a little olive oil onto the fish to help the breading stick, and then sprinkle my spice blend directly onto the fish—instead of putting in the breading. That way, I know that all of it goes where I want it (on the fish) and doesn’t get tossed out with excess breading.

ingredients:

  • 1 large sweet potato (about 14 ounces), unpeeled and cut into 1/3-inch-thick “fries”
  • 3 Tbsp. olive oil, divided
  • 1 tsp. kosher salt, divided
  • 3/4 tsp. black pepper, divided
  • 4 cups small broccoli florets
  • 3/4 tsp. garlic powder
  • 1/2 tsp. paprika
  • 1/4 tsp. cayenne pepper
  • 4 (6-ounce) catfish fillets
  • 2/3 cup yellow cornmeal
  • Cooking spray

instructions:

How to cook Sheet Pan Catfish Dinner

  1. Preheat oven to 425°F. Line a large rimmed baking sheet with parchment paper.
  2.  Combine sweet potato, 1 tablespoon oil, 1/4 teaspoon salt, and 1/4 teaspoon black pepper in a large bowl, tossing well to coat. Arrange in a single layer on prepared baking sheet. Bake at 425°F for 10 minutes.
  3. Meanwhile, combine broccoli, 1 tablespoon oil, 1/4 teaspoon salt, and 1/4 teaspoon black pepper in bowl, tossing well to coat.
  4. Combine remaining 1/2 teaspoon salt, 1/4 teaspoon black pepper, garlic powder, paprika, and cayenne pepper in a small bowl. Brush catfish fillets with remaining 1 tablespoon oil, and sprinkle evenly with spice mixture. Place cornmeal in a pie plate or shallow bowl; dredge catfish in cornmeal and shake off excess.
  5. Remove baking sheet from oven; turn sweet potato pieces over and push to outer edges of pan. Arrange catfish across middle of pan and coat tops with cooking spray. Scatter broccoli over sweet potato pieces. Bake at 425°F until fish and sweet potatoes are tender and broccoli is crisp-tender, about 15 minutes.

NOTES:

Calories 458; Fat 20g (sat 4g); Protein 29g; Carb 34g; Fiber 4g; Sugars 5g (added sugars 0g); Sodium 421mg
Created using The Recipes Generator

Grilled Catfish with Warm Street Corn Salad

Blog_Catfish_angle_shallowbowl_withlimes.jpeg

*sponsored post*

I grew up eating catfish—have always loved it for its sweet, mild flavor and buttery texture. And so I’m thrilled to be working in partnership with The Catfish Institute to promote U.S. Farm-Raised Catfish. Besides the fact that it’s always a guaranteed hit with my kids, I love U.S. Farm-Raised Catfish because it’s a sustainable choice I can feel good about: It gets a best choice/green designation from Monterey Bay Aquarium’s Seafood Watch program. 

In the following recipe that I created for this partnership, I grill spice-rubbed catfish fillets to give them a robust, slightly smoky flavor. And I pair these moist fillets with a warm, grilled corn salad based on my love of elote (Mexican street corn). It’s a friendly combo of buttery-rich fish and crunchy-sweet corn that’s brought together under a bright, herby sauce that’s basically a simplified version of chimichurri. This is family-friendly cooking that’s just special enough for company, too.

Yield: 4 servings (serving size: 1 catfish fillet, about 1 1/4 cups salad, and 2 Tbsp. sauce)
Author:

Grilled Catfish with Warm Street Corn Salad

prep time: 20 Mcook time: 16 Mtotal time: 36 M
I love this dish! Grilled corn gets tossed with a little mayo (but not too much), lime juice, chili powder, scallions, and cotija cheese for my off-the-cob take on street corn. This warm, savory salad is then topped with a spice-rubbed grilled catfish fillet and a dollop of simplified chimichurri sauce. The textures are wonderful: tender fish, crunchy corn, and unctuous sauce. And the flavors? Oh my! Sweet corn, salty cheese, bright and herby sauce, and rich fish combine in beautiful harmony.

ingredients:

  • 1 medium garlic clove, peeled
  • 1 1/2 cups coarsely chopped cilantro stems and leaves
  • 6 Tbsp. canola oil, divided
  • 1/4 tsp. crushed red pepper flakes
  • 1 1/2 tsp. kosher salt, divided
  • 1 1/2 tsp. grated lime zest, divided
  • 3 Tbsp. fresh lime juice, divided
  • 4 large ears shucked corn
  • 1 tsp. ground cumin
  • 1 tsp. garlic powder
  • 1/2 tsp. black pepper
  • 4 U.S. Farm-Raised Catfish Fillets
  • 1/4 cup mayonnaise
  • 1 tsp. chili powder
  • 1/2 cup thinly sliced green onions
  • 4 oz. cotija cheese, crumbled (can substitute feta or queso fresco)
  • Lime wedges (optional)

instructions:

How to cook Grilled Catfish with Warm Street Corn Salad

  1. Preheat grill to medium-high heat.
  2. While grill heats, place garlic clove in a mini food processor; process until finely chopped. Add cilantro; process until finely chopped. With processor running, gradually add 1/4 cup oil until well blended. Add red pepper, 1/4 teaspoon salt, 1/2 teaspoon lime zest, and 1 tablespoon lime juice; pulse until combined. Set aside.
  3. Brush corn with 1 tablespoon oil. Place corn on grill rack; grill until lightly charred on all sides, turning occasionally, about 8 minutes. Remove from grill and cool slightly.
  4. Combine 3/4 teaspoon salt, cumin, garlic powder, and black pepper. Brush catfish fillets with remaining 1 tablespoon oil. Sprinkle evenly on both sides with spice mixture. Arrange catfish on oiled grill rack; grill until fish flakes easily when tested with a fork, about 3-4 minutes per side. Remove from grill and keep warm.
  5. Cut corn kernels off the cobs and place in a large bowl. Combine corn, mayonnaise, chili powder, remaining 1 teaspoon lime zest and 2 tablespoons lime juice, and remaining 1/2 teaspoon salt. Stir in green onions and cheese. Serve corn salad with catfish and sauce. Serve with lime wedges, if desired.
Created using The Recipes Generator


Cumin and Black Pepper Baked Chicken Wings

P1130431.jpeg

I learned this awesome baking powder trick a few years ago (thank you, internet) for making baked chicken wings that you would swear were fried. The results are amazing—crispy skin with way less fuss and much easier cleanup. I’ve used this method at home for basic wings, plus these glazed wings I developed for a story I did for Southern Living. And last weekend, I tried making them with lots of toasty cumin flavor, borne from my love of cumin lamb. The results were, I must say, outstanding. The kids, the hubs, and I all went nuts for these wings. Scroll down below the recipe for tips and pointers. Oh, and I did not run nutrition analysis on these. Sorry, but when I’m having wings, I know I’m indulging. :-)

Yield: Serves 6 (serving size: about 6 wings)
Author:

Cumin and Black Pepper Baked Chicken Wings

prep time: 12 Mcook time: 40 Mtotal time: 52 M
This recipe is inspired by my love of cumin lamb—the Chinese restaurant dish that highlights the toasty goodness of that amazing spice. I use it here to season baked chicken wings, along with freshly ground black pepper. Both spices are toasted whole and then ground in a spice grinder or mortar and pestle. Believe me: It is beyond worth it to do this because the flavor is incomparable. This recipe also highlights a cool trick that produces baked wings that are crispy and taste as good as fried (but with far less mess)—tossing them with a little baking powder. It’s a trick I learned a few years ago and one that you won’t believe once you try it! This recipe comfortably serves six. Or, if your household is like mine, two reasonable adults and two hungry teenagers.

ingredients:

  • 2 Tbsp. cumin seeds
  • 1 Tbsp. black peppercorns
  • 1 Tbsp. plus 1 tsp. baking powder (do not mistakenly use baking soda)
  • 2 tsp. kosher salt
  • 2 tsp. garlic powder
  • 3 lb. chicken wings, separated into drumettes and flats (about 30-32 pieces)

instructions:

How to cook Cumin and Black Pepper Baked Chicken Wings

  1. Preheat oven to 450°F. Line a rimmed baking sheet with parchment paper (or with foil and then parchment paper if you don’t want to wash the pan).
  2. Heat a small, heavy skillet over medium-high heat. Add cumin seeds and peppercorns. Cook, shaking pan frequently, until very fragrant and toasted, about 1 minute. Immediately pour onto a plate or into a bowl (leaving them in the pan might burn them). Cool slightly. Place in a spice grinder or mortar and pestle and grind. Pour into a small bowl. Stir in baking powder, salt, and garlic powder.
  3. Pat chicken dry with paper towels and place in a large bowl. Sprinkle spice mixture over chicken and toss well to coat. Arrange chicken on prepared pan with fatty side down. Bake at 450°F for 25 minutes. Turn chicken over; bake until well browned and crispy, 15 to 20 minutes.
Created using The Recipes Generator

First things first: You need to prepare your pan. These wings do best when baked on parchment paper (I tried them on foil, and they weren’t as good). I don’t know why, but I’m sure some smart folks out there will understand the reason. Anyway, when they bake on parchment paper, you don’t need to fuss with arranging them on a wire rack or anything like that (one fewer dish to wash). But parchment paper is a little permeable, so some of the chicken drippings will seep through. I am lazy and don’t want this to happen, so I line my pan with foil first and then parchment—so I don’t have to wash anything!

P1130393.jpeg

Next, you need to toast and grind the cumin and peppercorns. I’m telling you—the flavor is so much better than if you start with pre-ground. Please trust me on this! Toast them in a hot skillet till they’re really fragrant. I wish you could smell these:

P1130395.jpeg

Once they’re toasted, let them cool off a bit and then grind them in a spice grinder (I use an ancient coffee grinder) or with a mortar and pestle if you like to go unplugged. Here’s the ground mixture:

P1130400.jpeg

Now, let’s talk about the chicken. I like to buy air-chilled chicken wings. One of the main benefits of air chilling is that the chicken does not take on excess water (as it would if it were brined), which means crispier skin. I found lots of big packs of air-chilled wings (maybe for football season?) at my local Whole Foods. The three-pound pack I bought cost $12.48. Seemed like a good price to me!

Anyway, even though the chicken is air-chilled, I still pat it dry with paper towels before tossing with spices. I just want the skin as dry as possible. I place it in a humongous bowl so that I can just shake the bowl to toss the chicken with the spices to coat.

P1130406.jpeg

Once the chicken is coated with the spice (and baking powder) mix, you need to arrange it on the prepared baking sheet with the fattier side down. Like this:

P1130411.jpeg

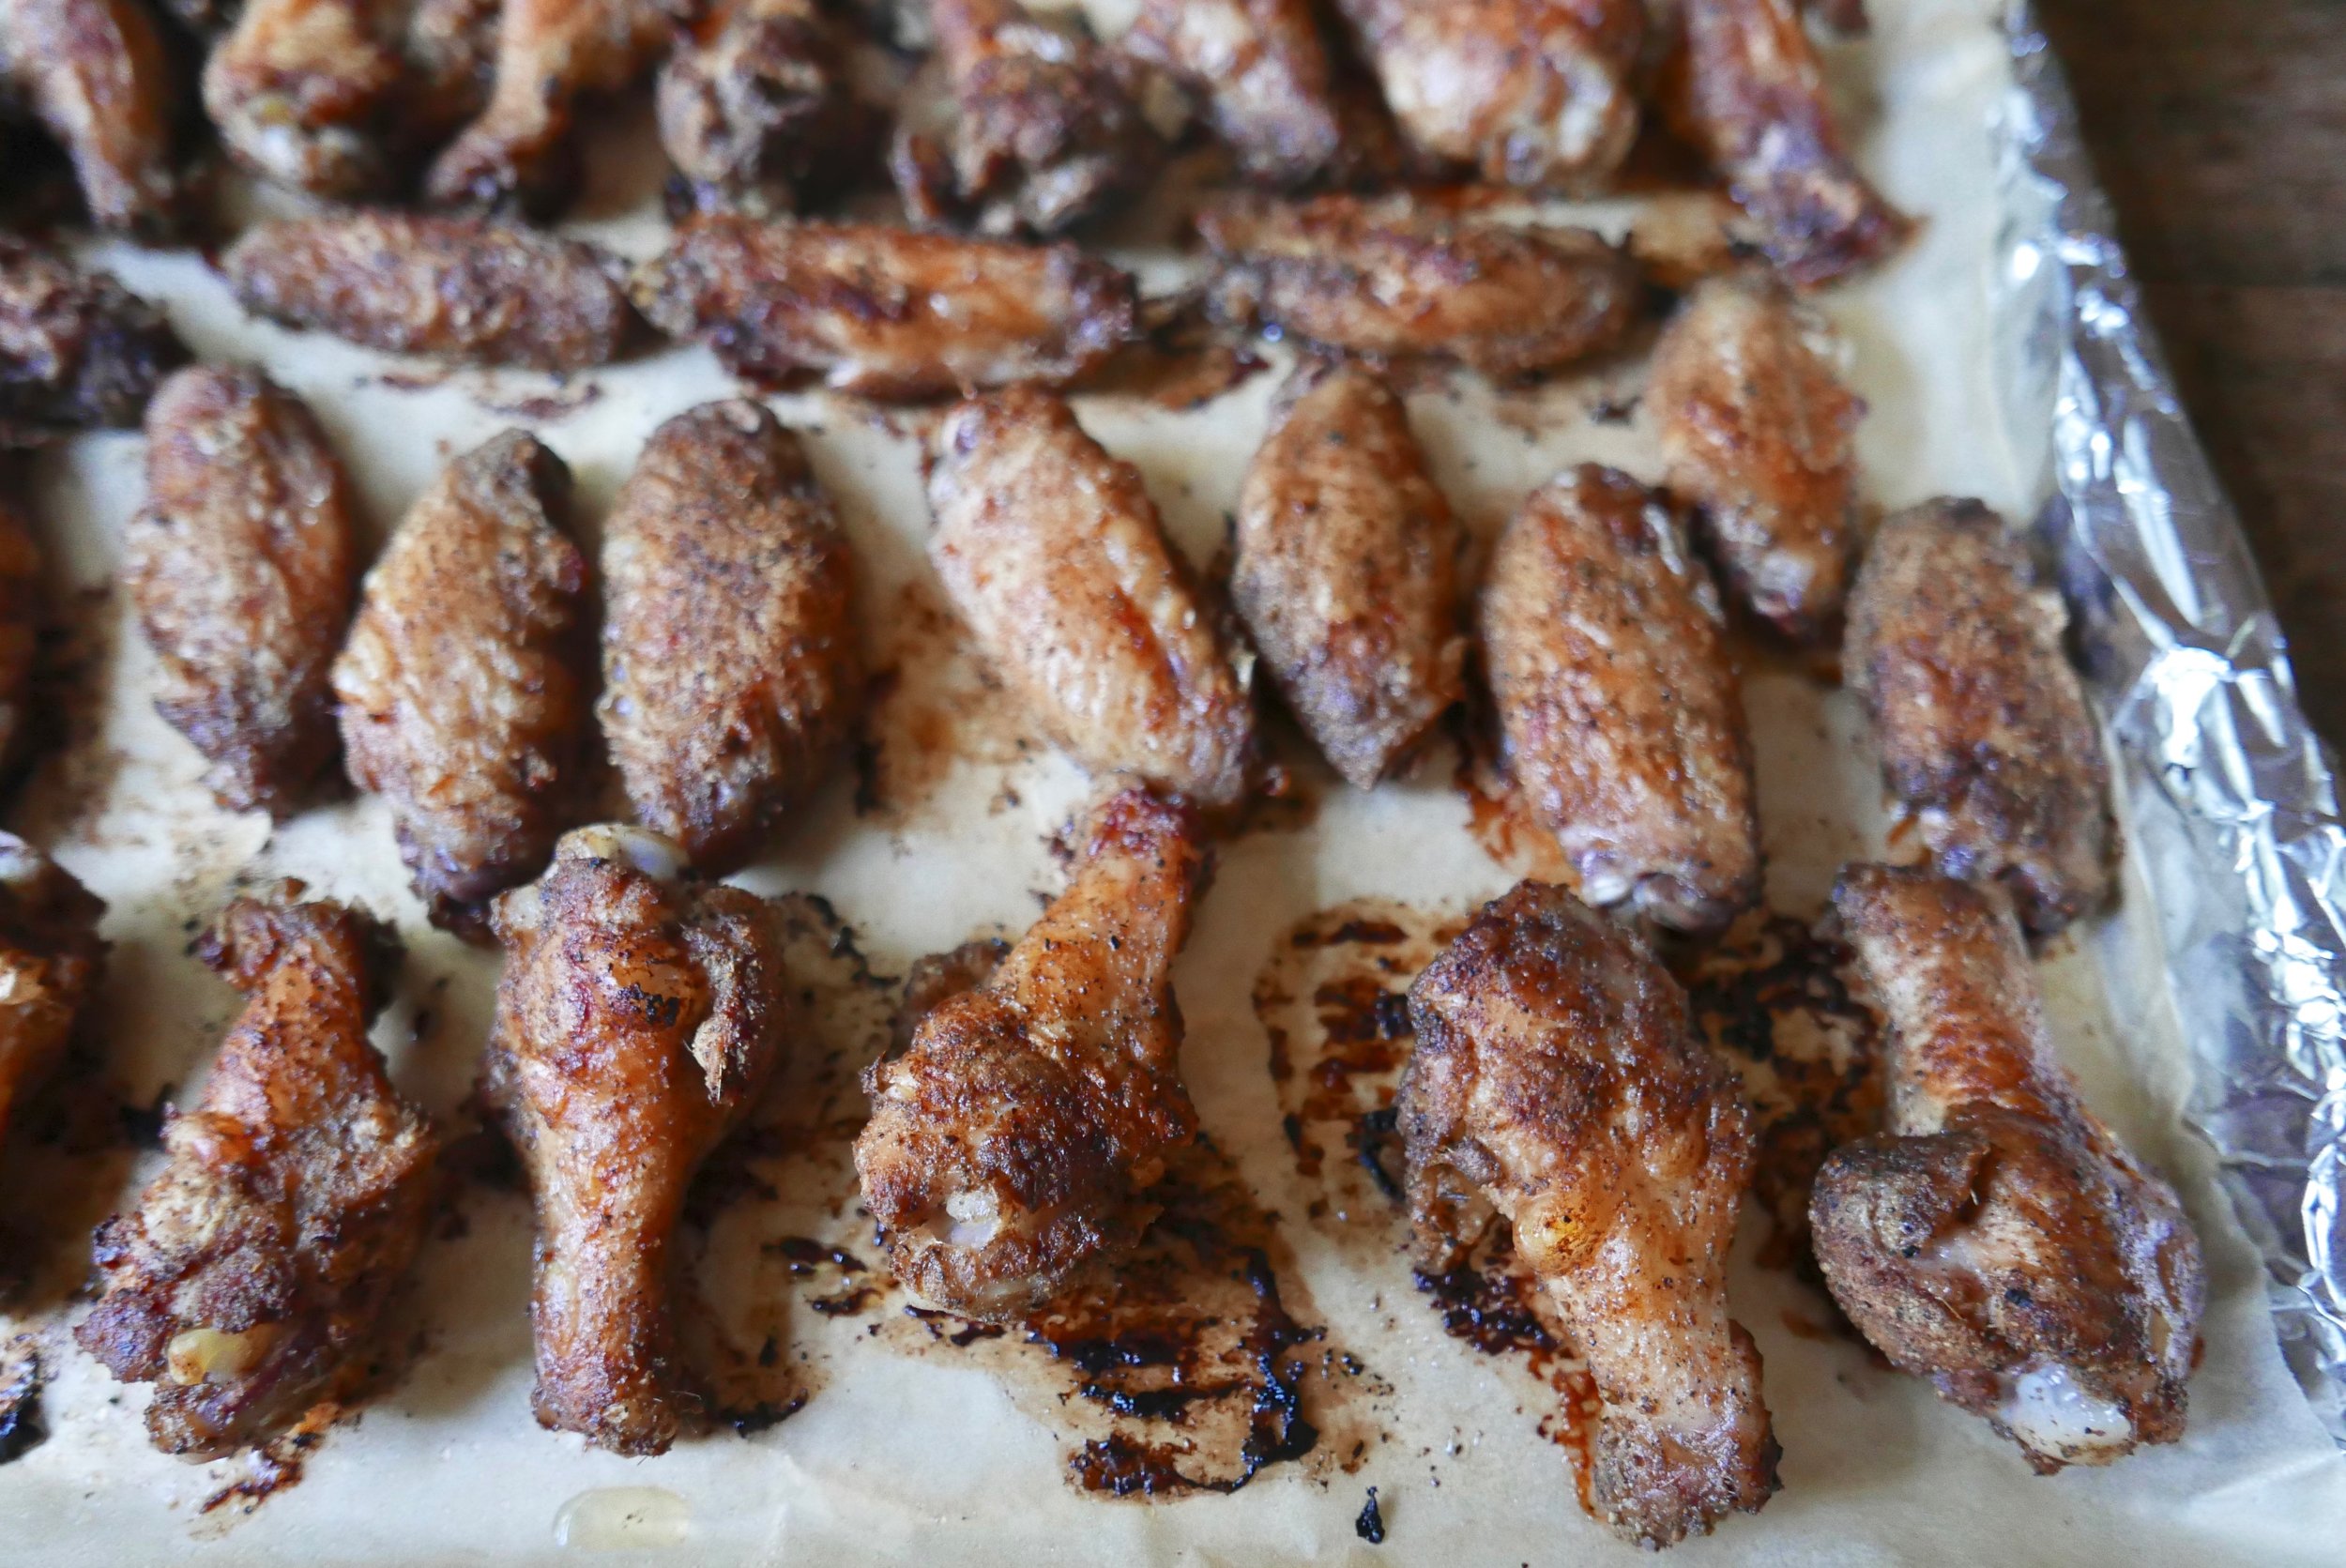
And this is what they look like when they’re done—super crispy with that incredible cumin flavor!

P1130418.jpeg

They’re so good that you might just eat them right off the pan! If you can control your urges, though, they work beautifully on a Snack Dinner tray, which is perfect for game day.

IMG_3621.jpeg

Simple Smoky Romano Beans

P1110264.jpg

This dish is so easy to make that it almost doesn't even warrant a written recipe. That said, it's nice to have a reference for how to prep ingredients like these Romano beans, a less-common variety of snap beans. If you can't find fresh Romano beans, you can sub in green beans; shorten the blanching time by a couple of minutes so they don't get overcooked. See notes below for Romano bean prep.

Yield: 4 (serving size: about 1 cup)
Author:

Simple Smoky Romano Beans

prep time: 5 Mcook time: 13 Mtotal time: 18 M
Oh yeah—this is the type of easy veggie dish I want (no, demand!) on repeat all summer long. It goes with anything and darn near steals the show despite its simplicity. It's quick to make, holds up well as leftovers, and seems to one-up regular green beans because of the meatier texture of Romano beans. (Of course, regular green beans will work beautifully here if you can't find Romano beans.) One simple spice addition gives it that type of can't-put-your-finger-on-it flavor oomph that makes a dish truly memorable.

ingredients:

  • 1 1/4 lb. fresh Romano beans (see notes below)
  • 1 1/2 slices thick-cut bacon (I know, it's an odd amount. But 2 slices were too many, and 1 slice wasn't enough.)
  • 1/4 to 3/8 tsp. ground coriander
  • 1/4 tsp. kosher salt
  • 1/4 tsp. freshly ground black pepper

instructions:

How to cook Simple Smoky Romano Beans

  1. Snap off stem ends of beans, pulling and discarding any strings. Snap beans in half or into thirds, and leave smaller beans whole. 
  2. Bring a large Dutch oven full of water to a boil. Add beans; boil until crisp-tender, 5 to 7 minutes. Drain and plunge beans into ice water to stop the cooking (or rinse under cold tap water). Drain well.
  3. Heat a large skillet over medium-high heat. Cut bacon crosswise into 1/2-inch strips. Add bacon to pan; cook until crisp, stirring occasionally, about 4 minutes. Remove bacon from pan with a slotted spoon, reserving drippings in pan. Add coriander to drippings; cook 15 seconds, stirring constantly. Add beans to pan; cook until thoroughly heated and lightly seared in spots, tossing frequently, about 4 minutes. Stir in salt and pepper. Sprinkle with bacon.

NOTES:

Calories 114; Fat 4g (sat 2g); Protein 3g; Carb 14g; Fiber 4g; Sugars 2g (added sugars 1g); Sodium 232mg
Created using The Recipes Generator
P1110252.jpg

Shopping for and Preparing Romano Beans

When I was a kid, every grocery store in Mississippi carried Romano beans—except they were labeled, and we called them, pole beans. These broad, flat snap beans are in the same family as green beans and have a similar flavor, though a little bit sweeter, and a meatier, firmer texture. Nowadays, I don’t see them in regular grocery stores but do find them at farmers’ markets and farm stands. I have to say, they are absolutely worth seeking out for that great flavor and irresistible texture.

We’re all pretty used to stringless string beans, so prepping these guys will provide a little nostalgia for those of you who remember pulling strings. (I did find some Romano beans at the farmers’ market a couple of weeks ago that were stringless, but most of the ones I’ve found this summer have strings.) Hold a pod, snap off the stem end, and pull down to remove the string. There might be strings on both sides of the bean, so snapping the bean in half or thirds will give you another shot or two at removing all strings. Once they’re prepped, you’ll want to blanch them for a few minutes in boiling water before finishing in the skillet for this recipe.

They’re also amazing grilled, so give that a try. Prep as explained above (including blanching), drain, and toss with oil before placing over hot coals for a minute or two on each side.

Cucumber, Cantaloupe, and Seared Halloumi Salad

IMG_3170.jpg

This here salad is my JAM. I’ve been getting the most amazing cantaloupes all summer (B’ham folks, I get them at Murphree’s Market)—better than they’ve been any other year I can remember. They are incredibly juicy, honey-floral sweet, and almost indecently fragrant. They are, with no exaggeration, swoon-inducing. And when paired with crisp cucumbers, pungent herbs, and warm halloumi cheese, they are the meal of dreams. Seriously, this salad with a glass of crisp white wine? My summer dream dinner!

Yield: 4 servings (serving size: about 1 1/2 cups)
Author:

Cucumber, Cantaloupe, and Seared Halloumi Salad

prep time: 10 Mcook time: 3 Mtotal time: 13 M
This simple salad celebrates the best of summer, when melons are at their juiciest, sweetest, most fragrant peak, herbs grow to thrilling heights in backyard gardens, and cucumbers offer extreme crunch with each bite. This pairs well with grilled fish or chicken, or stands up on its own for a light dinner—my favorite way to enjoy it. Well, with a very cold glass of white wine on the side, of course.

ingredients:

  • 1 1/2 Tbsp. extra-virgin olive oil, divided
  • 1 1/2 tsp. white balsamic vinegar
  • 1/4 tsp. kosher salt
  • 1/4 tsp. freshly ground black pepper
  • 6 thin cantaloupe wedges, halved crosswise
  • 2 Persian cucumbers (the mini cukes), shaved lengthwise into ribbons with a vegetable peeler
  • 4 oz. halloumi cheese, cut into 1/4-inch-thick slices
  • 2 Tbsp. small fresh mint leaves
  • 2 Tbsp. small fresh basil leaves (or larger leaves, torn)

instructions:

How to cook Cucumber, Cantaloupe, and Seared Halloumi Salad

  1. Combine 1 tablespoon oil, vinegar, salt, and pepper in a large bowl, stirring with a whisk. Add cantaloupe and cucumbers; toss gently to coat. Let stand 5 minutes.
  2. Heat a large nonstick skillet over medium-high heat. Add remaining 1 1/2 teaspoons oil; swirl to coat. Add cheese to pan; cook until nicely browned, 1 1/2 to 2 minutes per side.
  3. Arrange cantaloupe mixture on a platter; drizzle any juices from the bowl over cantaloupe and cucumbers. Arrange warm halloumi on platter. Sprinkle with mint and basil. 

NOTES:

Calories 199; Fat 13g (sat 6g); Protein 7g; Carb 15g; Fiber 2g; Sugars 12g (added sugars 0g); Sodium 392mg
Created using The Recipes Generator

Smoky Spice-Rubbed Catfish with Peach-Tomato Salad

SmokyCatfish_angle.jpg

*sponsored post*

I am so excited to partner with The Catfish Institute to promote the goodness of U.S. Farm-Raised Catfish. It’s a sustainable seafood option you can feel good about—it gets a “best choice” rating from Monterey Bay Aquarium’s Seafood Watch program—and because of the way it’s farmed and fed, it has a reliably mild, buttery flavor every time. 

I grew up in Mississippi, where catfish was a mainstay. Back then, we typically had it fried—which is fantastic—but the mild, sweet flavor of U.S. Farm-Raised Catfish is versatile enough to shine with other cooking methods, too. Here, I’ve rubbed it with some robust spices and given it a turn on the grill with some wood chips for a wonderfully smoky flavor. And because the fish itself is so mild, it pairs fantastically with fruit, in this case a summery mixture of sweet cherry tomatoes and even sweeter peaches. It’s an elegant take on a family-friendly fish you should get to know a little better, especially if you’re working to get more fish into your diet.

Yield: 4 servings (serving size: 1 catfish fillet and about 3/4 cup salad)
Author:

Smoky Spice-Rubbed Catfish with Peach-Tomato Salad

prep time: 30 Mcook time: 10 Mtotal time: 40 M
A whiff of wood smoke amps up spice-rubbed catfish in this stunning summer recipe. The mild flavor of the fish pairs beautifully with the fruity, herby salad.

ingredients:

  • 1 cup oak, hickory, or pecan wood chips
  • 4 U.S. Farm-Raised Catfish Fillets
  • 2 tablespoons olive oil, divided
  • 1/2 teaspoon garlic powder
  • 1/2 teaspoon paprika
  • 1/2 teaspoon ground cumin
  • 1 teaspoon kosher salt, divided
  • 3/4 teaspoon black pepper, divided
  • 1/4 cup slivered red onion
  • 1 1/2 cups halved cherry tomatoes
  • 1 1/2 cups thin peach wedges, cut in half crosswise
  • 1 1/2 teaspoons white wine vinegar
  • 3 tablespoons thinly sliced fresh basil
  • Basil sprigs (optional)

instructions:

How to cook Smoky Spice-Rubbed Catfish with Peach-Tomato Salad

  1. Soak wood chips in water for 30 minutes; drain. Meanwhile, prepare grill for indirect grilling, heating one side of grill to medium-high and leaving other side with no heat. Maintain heat at about 400°F.
  2. Brush tops of catfish fillets with 1 tablespoon oil. Combine garlic powder, paprika, cumin, 3/4 teaspoon salt, and 1/2 teaspoon pepper; rub tops of fillets with spice mixture.
  3. Add soaked wood chips to coals. Arrange fillets, spice side up, on oiled grill rack over unheated side of grill. Close lid and cook until fish flakes easily when tested with a fork, about 10 to 12 minutes.
  4. Meanwhile, rinse onion in cold water; pat dry. Combine onion, tomatoes, peaches, vinegar, remaining 1 tablespoon oil, remaining 1/4 teaspoon salt, and remaining 1/4 teaspoon pepper. Toss gently to coat. Add basil; toss gently to combine. Serve salad with fillets. Garnish with basil sprigs, if desired.
Created using The Recipes Generator

Lady Pea and Tomato Salad

P1110285.jpeg

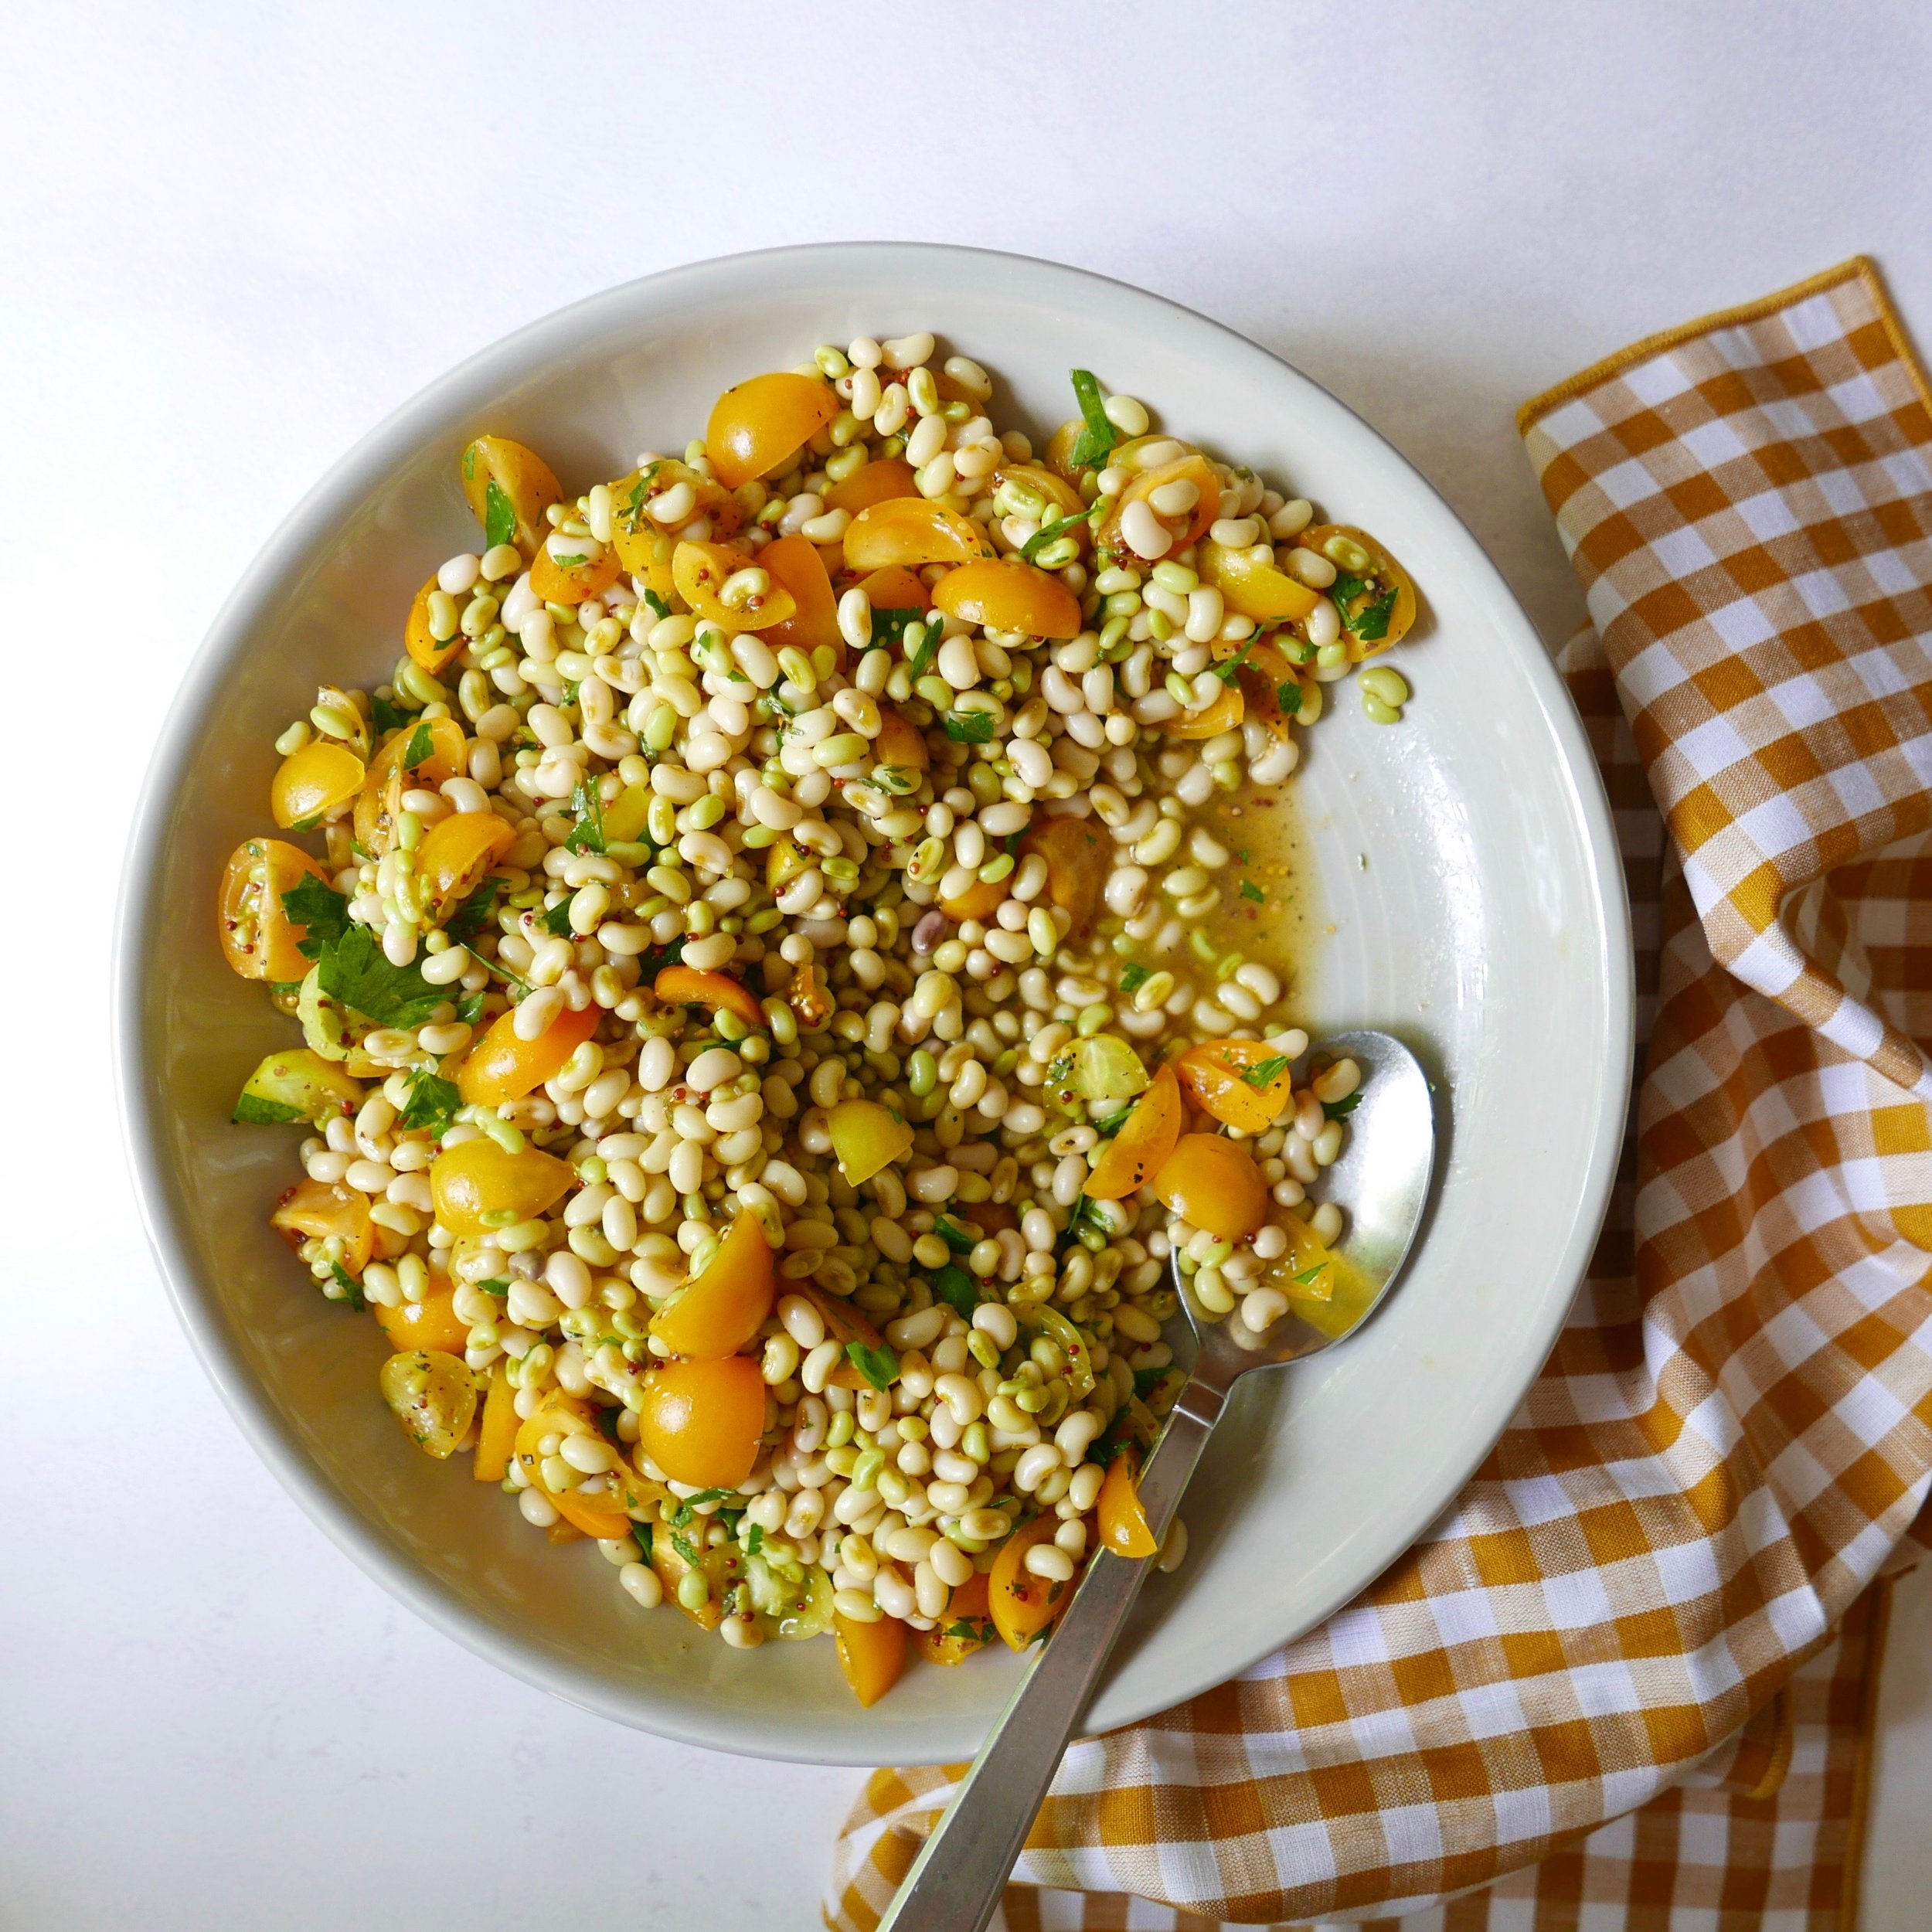
One of my favorite things about summer is that fresh Southern field peas are easy to find, at least around Birmingham and other places in the South. One particular type of field pea—lady peas—are probably my all-time favorite summer ingredient, and I love to cook up a pot to serve warm as a side—or turn them into a lovely salad as I’ve done here. It’s a versatile side, full of fresh summer flavor. It goes on repeat around here all throughout the season. Be sure to scroll below for more info on lady peas.

Yield: 6 (serving size: about 1 scant cup)
Author: Ann Taylor Pittman

Lady Pea and Tomato Salad

prep time: 15 Mcook time: 20 Mtotal time: 35 M
This is one of my all-time favorite summer sides. Why? Because it goes with anything (burgers, steaks, grilled fish, seared scallops), because I can make it ahead and serve it at room temperature, and because it just tastes so good--clean, simple, wonderful flavors. See below for more info on lady peas. If you can't find them, you can sub fresh lima beans.

ingredients:

  • 1 lb. fresh shelled lady peas (see note below)
  • 4 cups water
  • 2 bay leaves
  • 3 thyme sprigs
  • 2 cups quartered cherry tomatoes (I used yellow ones)
  • 3/4 tsp. kosher salt, divided
  • 1/2 tsp. freshly ground black pepper, divided
  • 2 Tbsp. extra-virgin olive oil
  • 1 Tbsp. red wine vinegar
  • 1 Tbsp. whole-grain Dijon mustard
  • 2 tsp. chopped fresh thyme

instructions:

How to cook Lady Pea and Tomato Salad

  1. Combine peas, water, bay leaves, and thyme sprigs in a large saucepan. Bring to a boil over high heat. Reduce heat, and simmer until peas reach desired degree of tenderness, 20 to 30 minutes. Drain peas and rinse with cold water. Discard bay leaves and thyme sprigs.
  2. Meanwhile, combine tomatoes, 1/2 teaspoon salt, and 1/4 teaspoon pepper; let stand 20 minutes while peas cook.
  3. Combine remaining 1/4 teaspoon salt, remaining 1/4 teaspoon pepper, oil, vinegar, mustard, and chopped thyme in a small jar; shake well until emulsified. 
  4. Combine peas, tomatoes and all their juices, and dressing in a large bowl; toss well to combine. Serve chilled or at room temperature. 

NOTES:

Calories 126; Fat 5g (sat1 g); Protein5 g; Carb 15g; Fiber 5g; Sugars 4g (added sugars 0g); Sodium 156mg
Created using The Recipes Generator

About Lady Peas

Lady peas are a type of Southern field pea with a clean flavor and less-starchy texture than other varieties, such as crowder peas or pink-eye peas/purple hull peas. They have a delicate flavor and wonderful creamy texture that is just something special. If I’m cooking up a pot to enjoy as a warm side dish, I’ll first sauté onions, then add the peas, bay leaves, thyme sprigs, and chicken stock to cover. Once the peas reach the level of tenderness I like, I’ll take them off the stove and just let them sit for a bit. I find that this step (letting them rest) produces amazing results—the creamiest texture throughout. For this salad, though, I like to keep the texture a teensy bit firmer, so I skip that step. Here’s what shelled lady peas look like:

P1110278.jpeg

Aren’t they pretty? Well, I think they are. I can usually find them easily from June till late July at farmers markets and farm stands. Here’s a little more about lady peas from the good folks at Southern Living, if you care to learn more about them. If I can ever find them still in their pods (surprisingly hard to find), I snatch them up—because shelling peas is one of my favorite things to do.

You can turn this salad into a main by adding some protein—some grilled chicken or shrimp, sliced steak, or my favorite, seared scallops:

P1110308.jpeg

Beet and Cherry Salad with Pistachio-Mint Gremolata

P1110297.jpeg

A few weeks back, I played with a monochromatic golden beet and mango salad. It was so stinking good that I thought, welp, why not try a monochromatic red beet salad? So I paired the earthy roots with sweet Bing cherries, and it was a match made in heaven! As always, I give you the recipe up front here, and the notes and tips are below.

Yield: 4 (serving size: about 1 cup)
Author: Ann Taylor Pittman

Beet and Cherry Salad with Pistachio-Mint Gremolata

prep time: 30 Mcook time: 6 Mtotal time: 36 M
Wow, what a great combo! Sweet, juicy cherries and earthy beets form a gorgeously monochromatic base for a salad featuring a lovely whiff of cardamom in its dressing. The pistachio-mint-lemon gremolata offers a pop of contrasting color, crunch, and flavor. I use a quick microwave method to "roast" the beets, so the salad comes together quickly. You can make the salad and the gremolata a day or two ahead; just store them separately until ready to serve.

ingredients:

  • 1 lb. small trimmed beets (for me, this was 6 beets)
  • 1 lb. sweet cherries
  • 2 Tbsp. extra-virgin olive oil
  • 1 1/2 Tbsp. white balsamic vinegar
  • 1 tsp. Dijon mustard
  • 1 tsp. honey
  • 1/2 tsp. kosher salt
  • 1/4 tsp. freshly ground black pepper
  • 1/8 tsp. ground cardamom
  • 1/4 cup chopped unsalted roasted pistachios
  • 1 Tbsp. finely chopped fresh mint
  • 1 1/2 tsp. grated lemon zest (from 1 large lemon)

instructions:

How to cook Beet and Cherry Salad with Pistachio-Mint Gremolata

  1. Pierce each beet once with the tip of a small knife. Place beets on a large sheet of microwave-safe parchment paper; wrap tightly. Microwave on HIGH for 6 minutes or until beets are tender. (If your beets are larger than mine were, they will take longer. Go in 1-minute increments until they reach the desired tenderness.) Cool beets slightly; trim off stem end, and remove skins. Cut beets into thin wedges.
  2. Meanwhile, pit cherries, and cut in half. 
  3. Combine oil, vinegar, mustard, honey, salt, pepper, and cardamom in a small jar; seal and shake well until emulsified. Combine beets and cherries in a large bowl. Drizzle with dressing; toss gently to coat.
  4. Combine pistachios, mint, and lemon zest; sprinkle over salad just before serving.

NOTES:

Calories 209; Fat11 g (sat 1g); Protein 4g; Carb 29g; Fiber 6g; Sugars 19g (added sugars 2g); Sodium 241mg
Created using The Recipes Generator

How to Microwave-Roast Beets

First, try to use small beets for even, quick cooking. Mine were between two and three ounces each. Pierce each beet once with the tip of a sharp knife, and place on a large sheet of microwave-safe parchment paper.

P1110288.jpeg

Wrap the beets tightly in the parchment paper, folding over the edges to create a good seal, and turn the package so the seams are on the bottom. Microwave like this for six minutes (or longer if your beets are larger).

P1110289.jpg

Once the beets are done, let them cool down until they’re cool enough to handle. Then you can cut off the stem end and peel off the skins.

P1110294.jpg

My Favorite Cherry Pitter

Trust me: If you make a cherry pie or cobbler or salad at least once a year, you should invest in a cherry pitter. It makes the job of loosening and removing those suckers So. Much. Easier. I love the one pictured below, which I’ve had for 10+ years. It’s made by Oxo, and it does the job really well. And the splatter guard keeps my clothes nice and clean—which means a lot to me, because I never wear an apron.

P1110291.jpeg

Marinated Zucchini Slaw

P1110260.jpeg

Have a glut of zucchini? Or just love it? Or on the lookout for a killer make-ahead side dish that everyone will want the recipe for? Look no further—Marinated Zucchini Slaw is here!

Yield: 4 (serving size: about 1 cup)
Author: Ann Taylor Pittman

Marinated Zucchini Slaw

prep time: 37 Mcook time: total time: 37 M
In the summer, when zucchini is sweetest and most abundant, I'm always looking for new ways to use it. That's how this make-ahead slaw came into being. The flavor profile leans Greek-ish, with oregano, lemon juice, olive oil, and feta, and the texture is just fantastic—crunchy, but more chewy-crunchy than crunchy-crunchy. Important first step: I salt the zucchini to draw out a lot of its moisture. That way, you won't end up with watery slaw, no matter how far ahead you make it. Trust me: I made a double batch and ate the leftovers for three days. Check out my delicious leftover makeover idea below!

ingredients:

  • 4 cups matchstick-cut zucchini (from about 1 1/2 lb. zucchini)--see notes below
  • 1 tsp. kosher salt
  • 1 cup matchstick-cut carrots
  • 1/2 cup chopped green onions
  • 1 Tbsp. finely chopped fresh oregano
  • 2 Tbsp. extra-virgin olive oil
  • 2 Tbsp. fresh lemon juice
  • 1/2 tsp. freshly ground black pepper
  • 2 oz. feta cheese, crumbled

instructions:

How to cook Marinated Zucchini Slaw

  1. Combine zucchini and salt in a large strainer or colander; toss well to coat. (Don't worry about the amount of salt—much of it drains off with the water.) Strain over the sink or over a bowl for 30 minutes.
  2. Combine carrots, green onions, oregano, oil, lemon juice, and pepper in a large bowl; toss well to combine.
  3. Pat zucchini dry on a double layer of paper towels. Add zucchini to carrot mixture; toss well to combine. Add feta; toss gently to combine.

NOTES:

Calories 124; Fat 9g (sat 3g); Protein 4g; Carb 8g; Fiber2 g; Sugars 5g (added sugars 0g); Sodium 280mg
Created using The Recipes Generator

Matchstick-Cut Zucchini

You can certainly make matchstick-cut zucchini by hand—cutting into very thin planks, then into little matchsticks. Or you can use a mandoline, if you have one. But I love using my julienne peeler for the job. I keep the stem end on the zucchini and use it as a handle, then drag the peeler down the length of the squash. I make a few strokes, until I reach the seedy middle, then rotate the zucchini and start on another side. I find that the seedy middle part doesn’t hold up well for this type of recipe. Don’t throw this core away, though. You can shred it and add to pancake or muffin batter, meatloaf, or burger patties for extra moisture. Or you can chop it up, sauté it, and use it in fried rice, soup, omelets—you name it..

IMG_3067.jpeg

Once I have a pile of long shreds, I cut them in half so the slaw is easier to eat. You could also try this recipe with zoodles (I’d cut them so they’re not so long), or with shredded zucchini.

IMG_3069.jpeg

And I know that you can buy matchstick carrots, but since you already have that julienne peeler out, why not go ahead and cut your own fresh ones? You can nibble on the cores when you’re done.

IMG_3071.jpeg

Straining the Zucchini

This step is super important. If you skip it, I promise you’ll regret it! You’ll end up with a pool of liquid at the bottom of the bowl (ever had that happen with zoodles?). Look at all the liquid that drains off!

IMG_3075.jpeg

My Favorite Way to Use the Leftovers

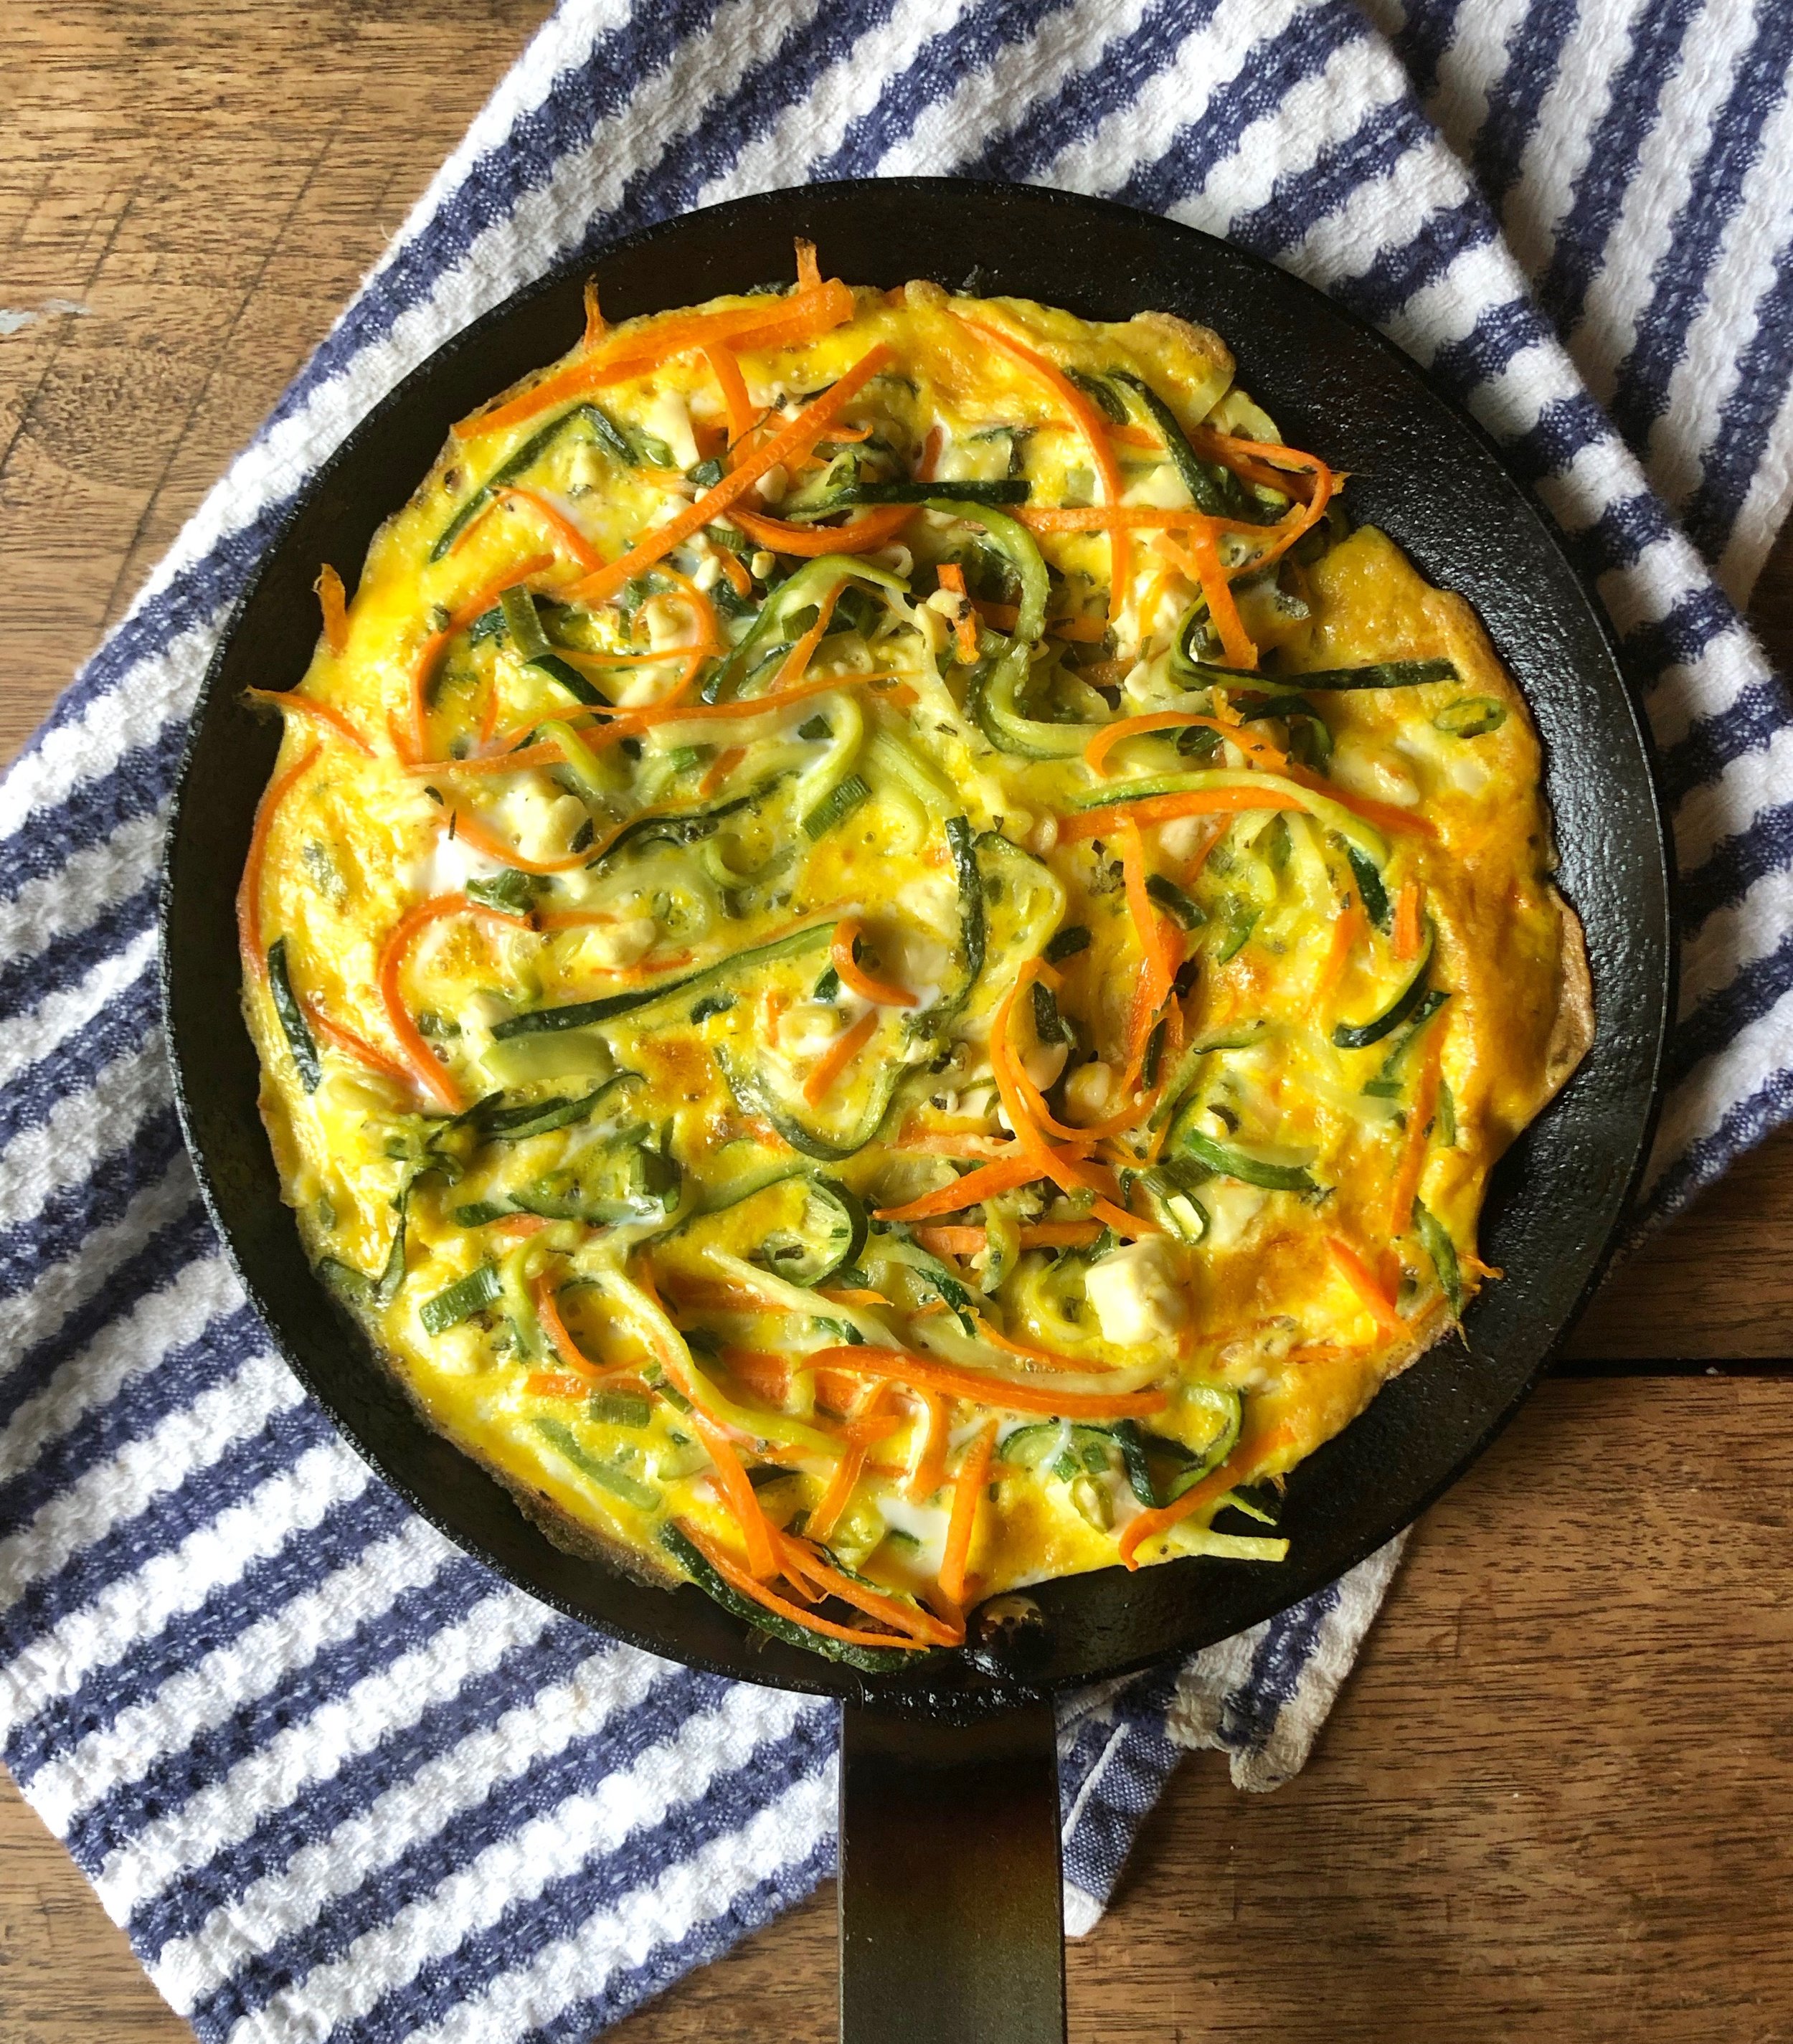
As I mentioned above, I made a double batch and enjoyed leftovers for days. I had them as a simple side dish, piled on a burger (really good), and atop a farro bowl (also very good). But my favorite way to enjoy the leftovers was in an individual frittata! I just warmed some up in my favorite little 8-inch skillet, and then poured two beaten eggs on top. I cooked this stovetop on medium heat for a couple minutes, then finished under the broiler for a couple minutes. So good!!

IMG_3095.jpeg

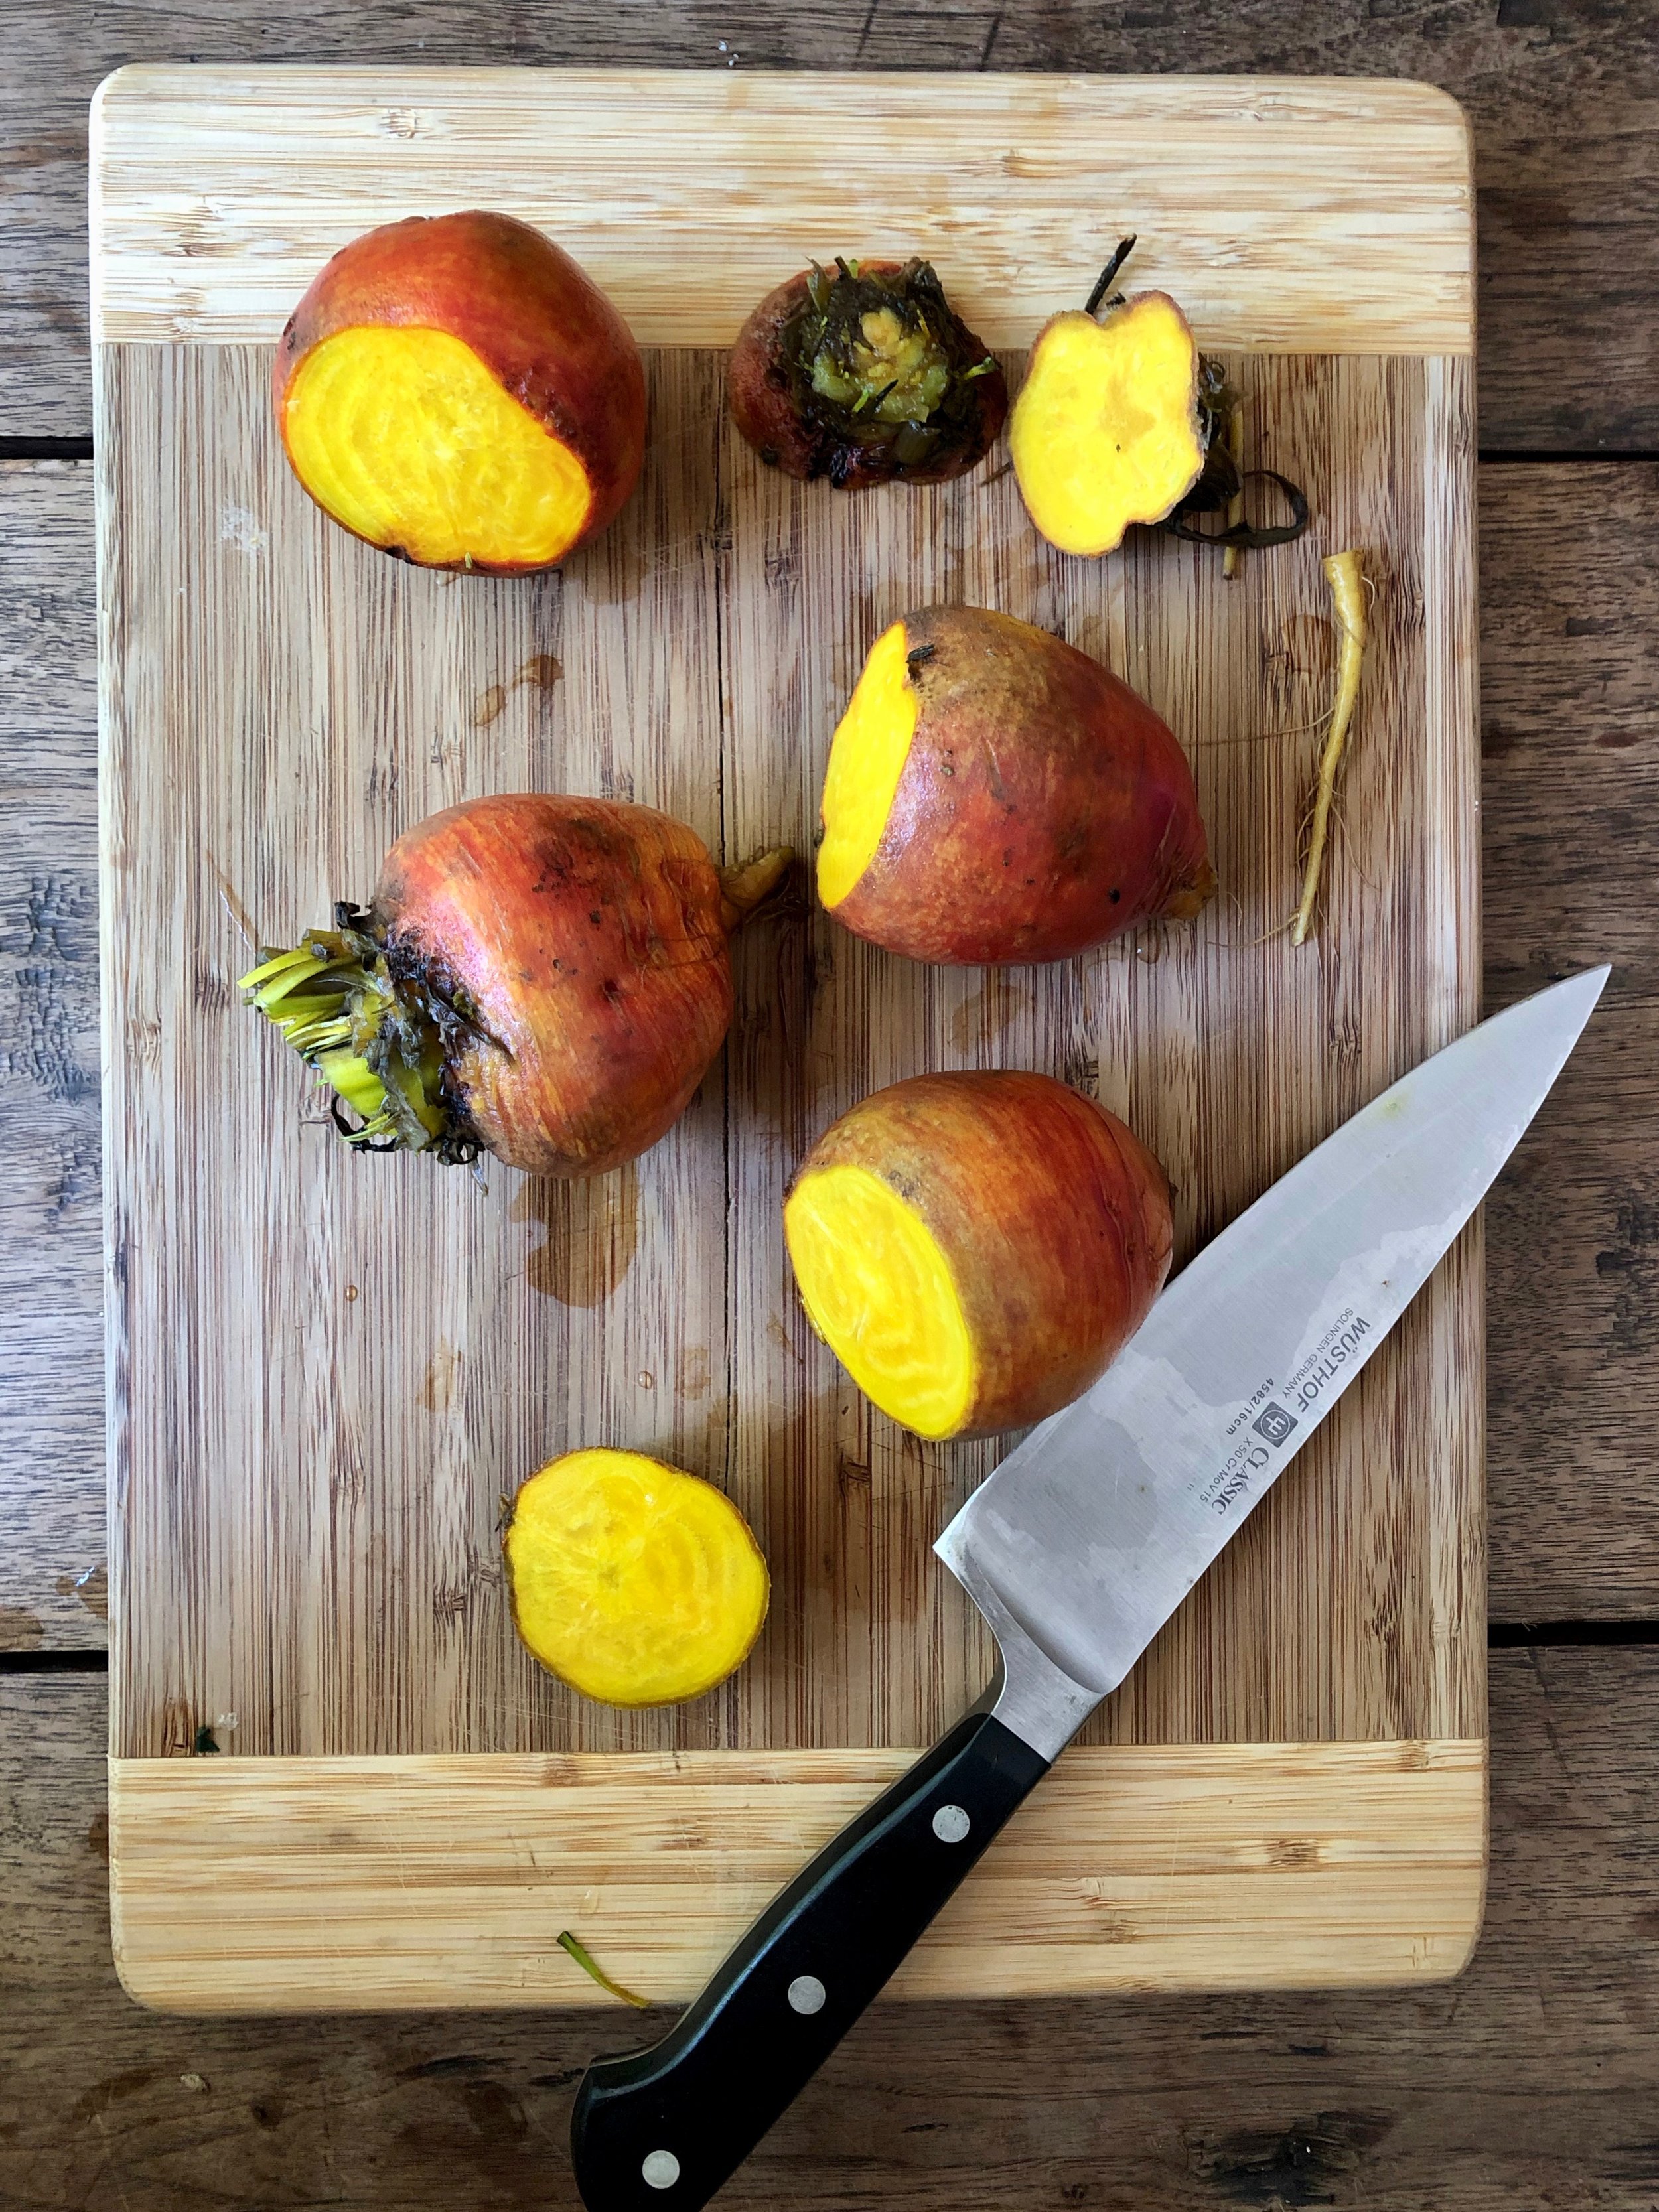
Golden Beet, Mango, and Avocado Salad

IMG_2715.jpg

Holy cow, this is such a great combo—one that I would not have come up with on my own. See, I had something similar recently in Santa Fe, at the lovely restaurant Paloma. The interplay of creamy avocado, earthy beets, and juicy-sweet mango was incredible … inspiring … memorable. I believe their salad was topped with pepitas, but I went with pine nuts for mine, along with a sprinkling of Tajin seasoning for zesty flavor and a hint of chile richness. Check out the recipe below, and then scroll down for beet and mango tips/how-tos.

Yield: 4 servings (serving size: about 1 cup)
Author:

Golden Beet, Mango, and Avocado Salad

prep time: 10 Mcook time: 1 hourtotal time: 1 H & 10 M
Wow, what a trio: Earthy, tender golden beets, juicy-sweet mango, and creamy avocado come together with a barely-there dressing (the ingredients are so good that they need little embellishment). Each serving boasts a hefty 7 grams of fiber, too. Serve alongside tacos, enchiladas, grilled chicken, or seared steak.

ingredients:

  • 1 lb. trimmed golden beets (about 4 medium)
  • 1 mango
  • 1 1/2 Tbsp. fresh lime juice
  • 1 Tbsp. extra-virgin olive oil
  • 1/4 tsp. kosher salt
  • 1 ripe, firm avocado
  • 2 Tbsp. toasted pine nuts
  • 2 Tbsp. fresh cilantro leaves
  • 1 tsp. Tajin seasoning (see note below)

instructions:

How to cook Golden Beet, Mango, and Avocado Salad

  1. Preheat oven to 425°F.
  2. Wrap trimmed beets in heavy-duty foil. Roast at 425°F until tender when pierced with a knife, about 1 hour. Let stand until cool enough to handle. Rub off and discard skins. Cut each beet into 8 wedges.
  3. Peel mango (a sharp paring knife works well for this). Carefully cut both mango "cheeks" from pit (see photos below). Slice mango cheeks crosswise.
  4. Place beet wedges and mango slices in a medium bowl. Drizzle with lime juice and oil, and sprinkle with salt. Toss gently to combine. 
  5. Peel and pit avocado; cut crosswise into slices. Arrange avocado and beet-mango mixture  on a platter. Sprinkle evenly with pine nuts, cilantro, and Tajin. 

NOTES:

Calories 221; Fat 12g (sat 2g); Protein 4g; Carb 28g; Fiber 7g; Sugars 20g (added sugars 0g); Sodium 350mg
Created using The Recipes Generator

How to Roast Beets

My favorite way to cook beets is to wrap them in foil and roast them in the oven. If you are pressed for time, though, you can wrap the beets in microwave-safe parchment paper and microwave on HIGH for 6 to 10 minutes. They won’t be quite as tender and moist, but they’ll still be good. Anyway, here’s how I roast in the oven. First, trim the tops of the beets and cut away any “tails.”

IMG_2689.jpeg

Then wrap the trimmed beets tightly in foil.

IMG_2691.jpeg

When the beets are done and have cooled off a bit, you can easily remove the skin. I like to use a paper towel to rub off the skins. Here, you can see little bits of skin in the foil; they just rub off easily, leaving a shiny, smooth peeled beet behind.

IMG_2696.jpeg

Then simply cut each beet into into 8 wedges (and try not to gobble them all up).

IMG_2701.jpeg

How to Cut a Mango

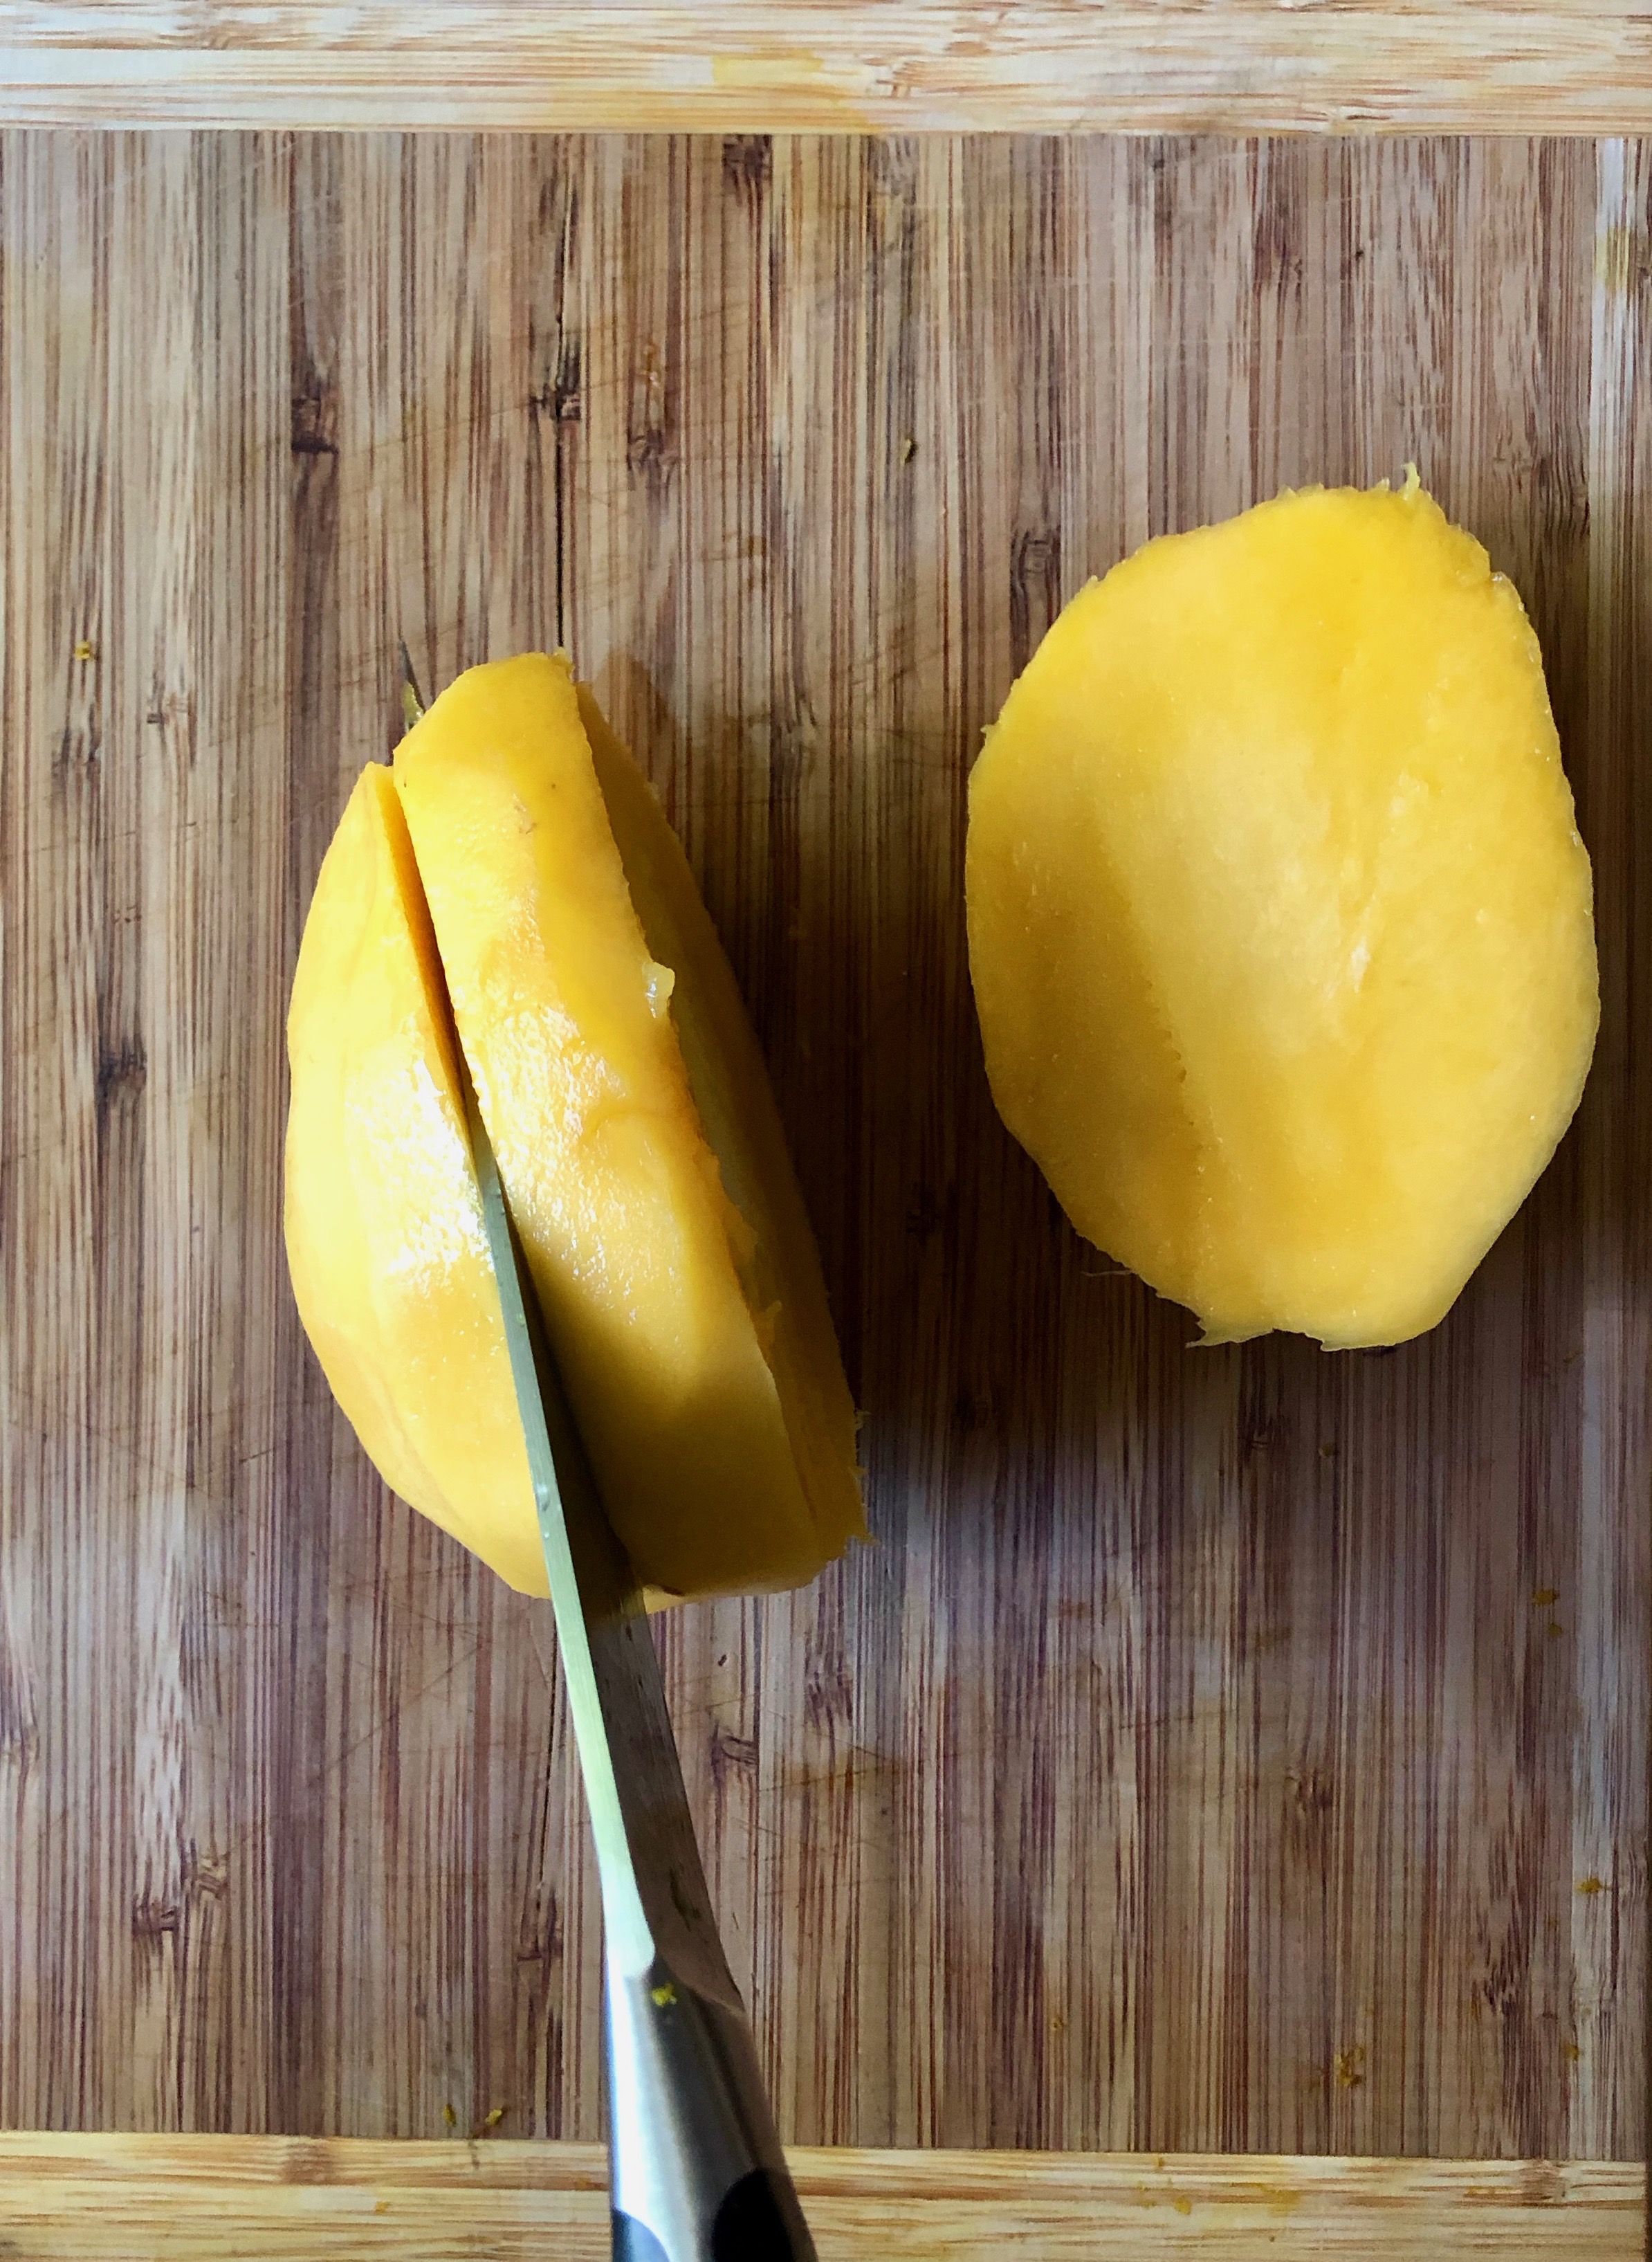
I know there are all kinds of tutorials online that show how to cut a mango. To me, the fastest, easiest way is to peel the entire mango and then cut off both “cheeks.” Holding the peeled mango (a paper towel might help you get a better grip—the peeled mango will be slippery) so that a narrower side is pointing up, slice somewhere between 1/4 inch and 1/2 inch from the middle. The pit will announce where it is, and your knife can just graze it as you cut down.

IMG_2702.jpeg

And then cut off the other cheek, on the other side of the pit. Once the cheeks are off, you can slice ‘em, cube ‘em, or keep ‘em whole.

IMG_2704.jpeg

I sprinkle this salad with Tajin seasoning. If you’re not familiar with it, it’s a combo of dried chile, dehydrated lime, and sea salt. It’s tangy, it’s salty, and it’s roasty-toasty with the essence of chiles but not necessarily the heat. It is absolutely delicious sprinkled over mango or watermelon or pineapple, used to rim a margarita glass, tossed with popcorn, or dusted over grilled chicken or beef. You’ll find it with the Mexican or Latin American foods in most supermarkets, and you’ll be glad you did!

IMG_2709.jpeg

Chicken Enchilada Dip with Corn

IMG_1324.jpeg

I will pull up a chair to a bowl of dip. I will flat-out embarrass myself. I just love it—all kinds, really. I once had a dip party, where we played board games and everyone brought a dip and dippers, and now I’m wondering why that was just a one-time thing. Anyway, although I love all kinds of dips (salsa! French onion! hummus! guac! spinach-artichoke!), I especially love one that’s warm, gooey, and cheesy. Here’s a dip that hits all those notes, and it incorporates chicken for heartiness and corn for that special crisp-sweet goodness. If you happen to end up with any left over, it makes a pretty great filling for jalapeño poppers—maybe sprinkled with a little bacon. Just sayin’.

IMG_1330.jpg
Yield: Serves 10 (serving size: about 1/4 cup)

Chicken Enchilada Dip with Corn

prep time: 10 minscook time: 23 minstotal time: 33 mins

This warm, creamy dip is a real crowd pleaser. It’s a little indulgent. I’m not claiming it’s light—but I do include the nutrition info so you know what you’re getting into (it’s not that bad). The little corn kernels offer a sweet, crunchy pop in every bite—that is, if you use fresh corn (frozen won’t be quite as crisp). As always, please shred your own cheese. The preshredded stuff is coated with starch to prevent it from clumping, and it won’t melt as creamy as cheese you prep yourself. Serve the dip with tortilla chips, pita chips, and/or assorted crudités.

ingredients:

  • 5 green onions, thinly sliced and divided
  • 1 Tbsp. canola oil
  • 2 large garlic cloves, minced
  • 1 cup fresh or frozen, thawed corn kernels
  • 1/2 cup green chile enchilada sauce (I used Frontera)
  • 1 (8-oz.) package 1/3-less-fat cream cheese
  • 1/4 tsp. kosher salt
  • 1/4 cup canola mayonnaise
  • 1 cup shredded skinless, boneless rotisserie chicken breast (4 oz.)
  • 4 oz. pepper Jack cheese, shredded and divided (about 1 cup)
  • Sliced green onions, sliced jalapeño, and extra corn kernels for garnish (optional)

instructions:

  1. Preheat oven to 400°F.
  2. Separate the bottom white part of onions from the green onion tops. Heat a large skillet over medium heat. Add oil; swirl to coat. Add white onion bottoms and garlic; cook 2 minutes, stirring frequently. Add corn; cook 3 minutes, stirring frequently. Stir in green onion tops, enchilada sauce, cream cheese, and salt. Cook until cream cheese melts, stirring frequently. Stir in mayonnaise. Gently fold in chicken and half of pepper Jack.
  3. Spoon mixture into an oven-safe 3-cup baking dish. Top evenly with remaining pepper Jack. Bake at 400°F until bubbly around the edges and cheese on top melts, about 15 minutes.

NOTES:

Calories 159; Fat 12g (sat 5g); Protein 6g; Carb 6g; Fiber 0g; Sugars 2g (added sugars 0g); Sodium 303mg
Created using The Recipes Generator

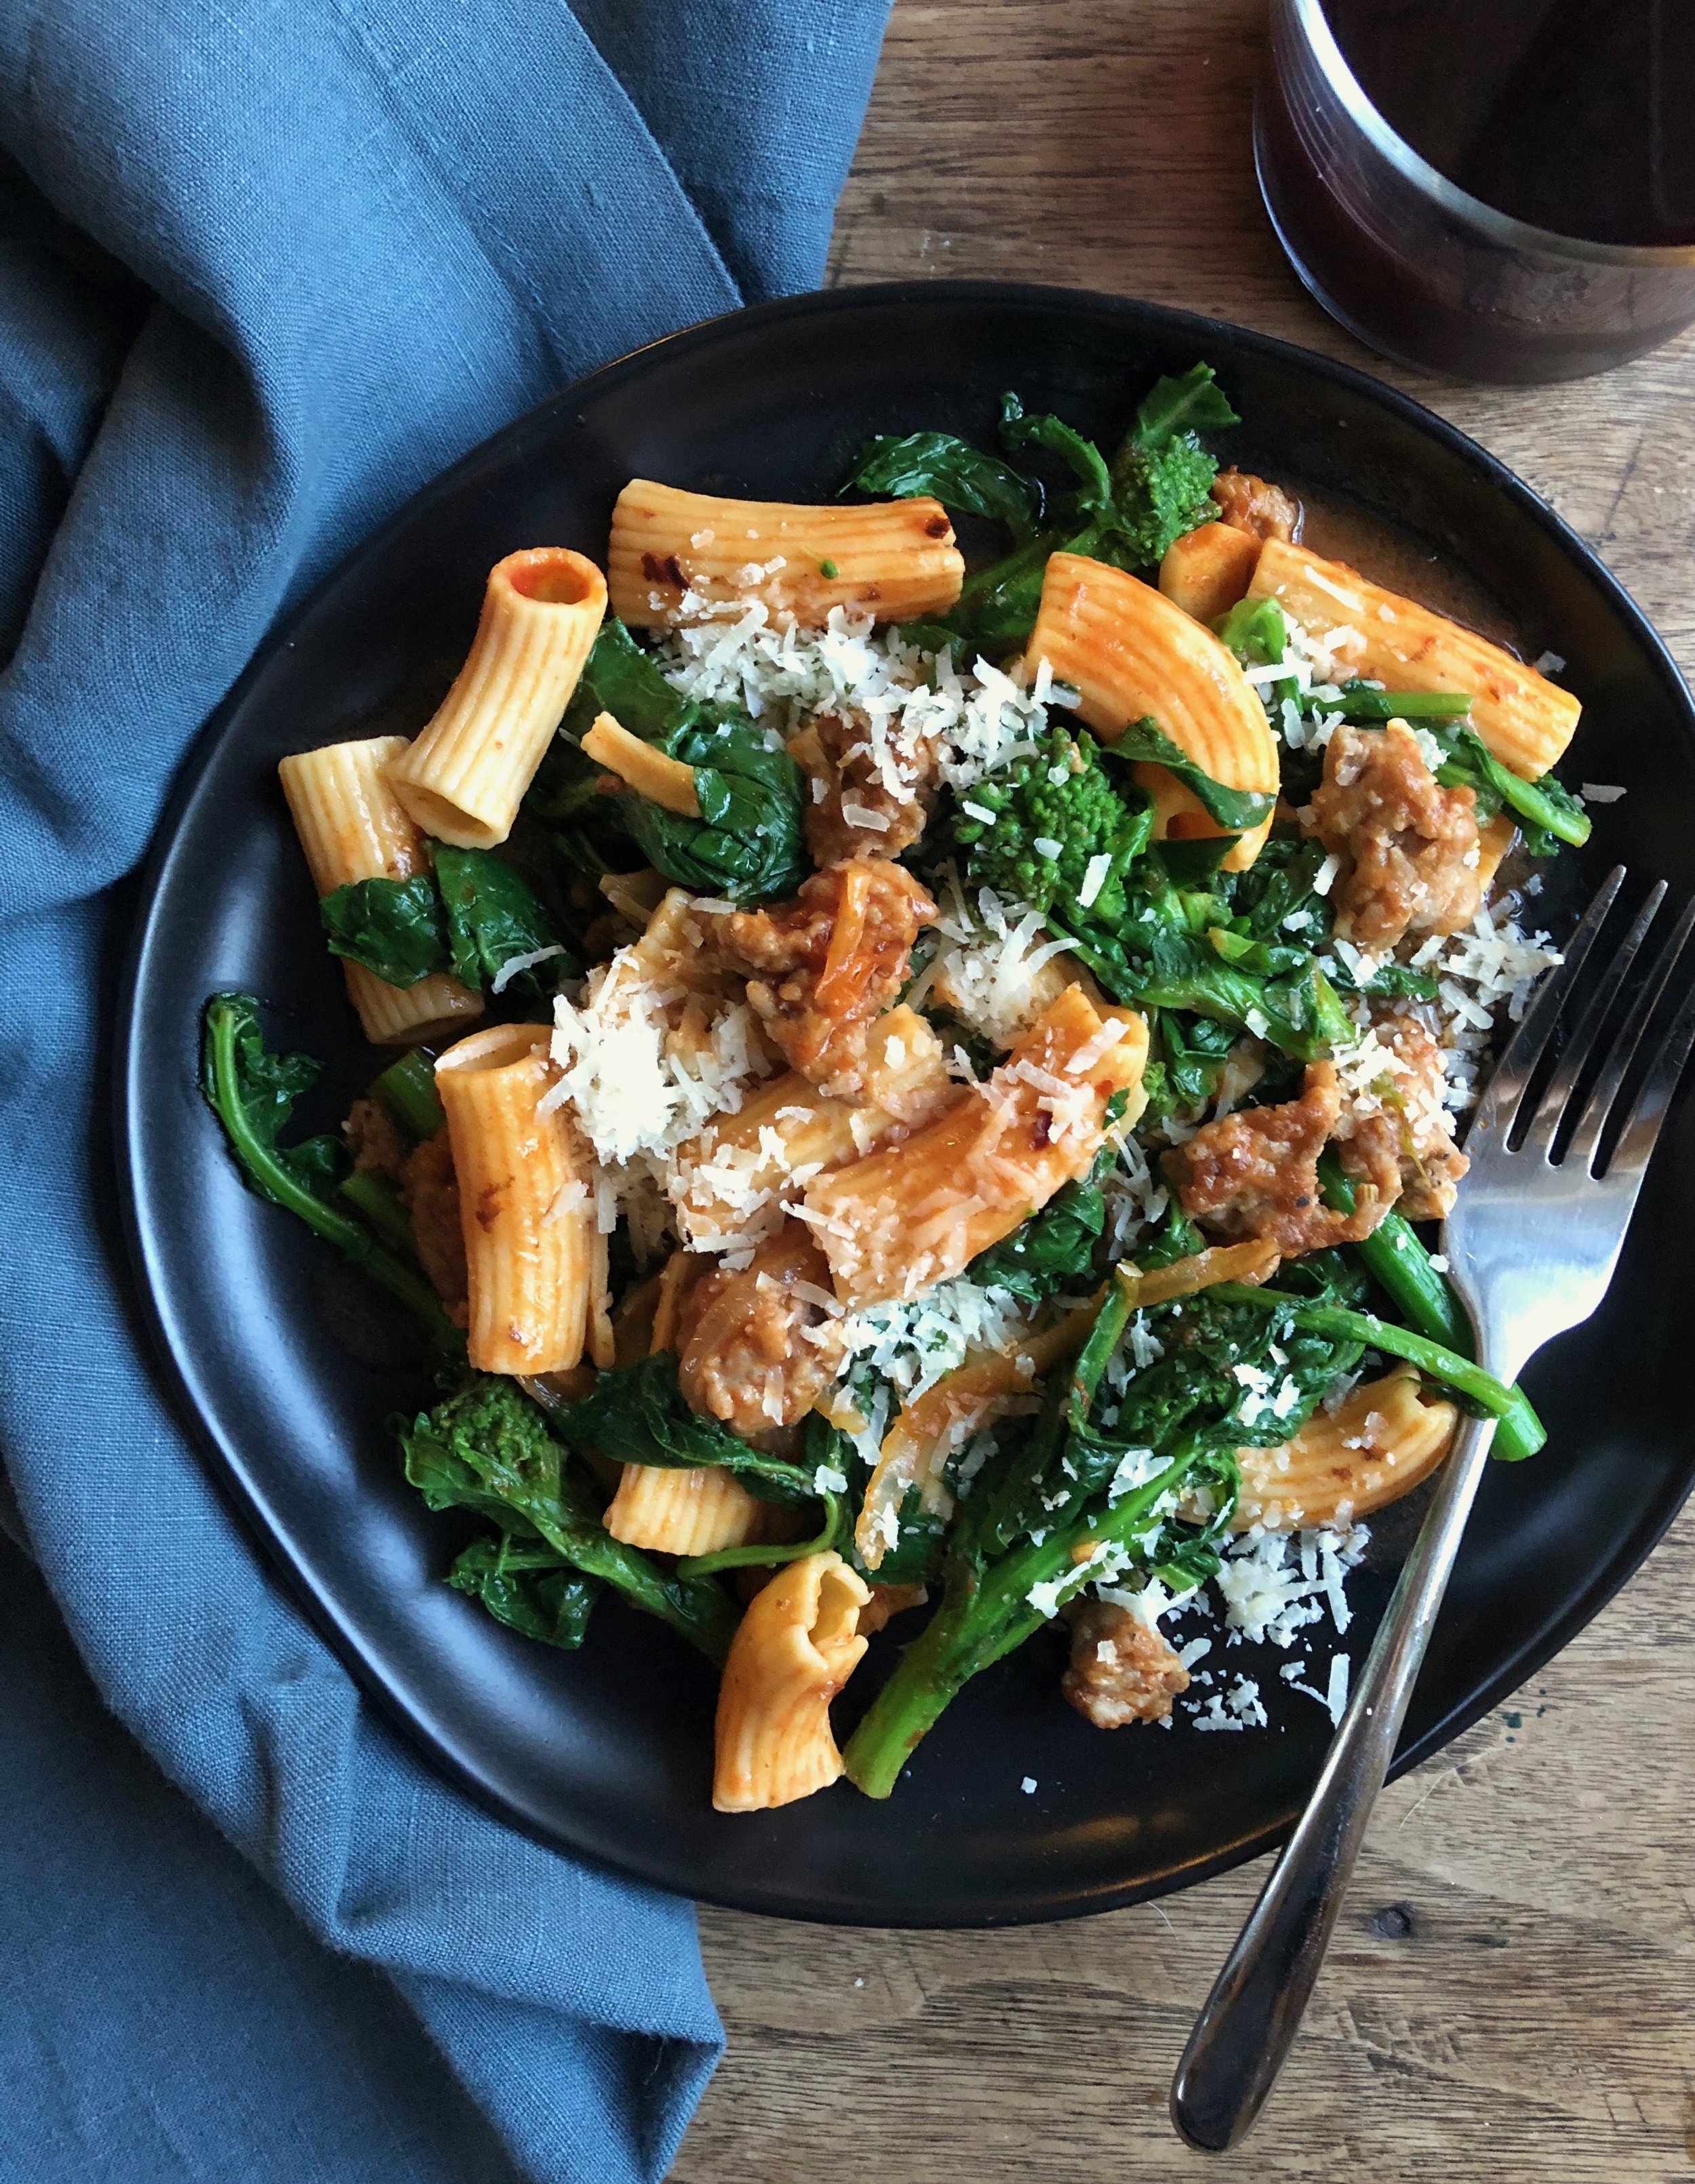
Chickpea Pasta with Broccoli Rabe and Sausage

IMG_1188.jpeg
Yield: Serves 4 (serving size: 2 cups pasta and 1 Tbsp. cheese)

Chickpea Pasta with Broccoli Rabe and Sausage

prep time: 10 minscook time: 20 minstotal time: 30 mins

This is one of those fallback recipes you can count on when you have little time to cook but want something really good, really comforting, and really easy. My hubs said it felt creamy and indulgent, but it’s actually quite light at only about 400 calories. The serving size is large, too (2 cups!), and all that fiber (13 grams!) will fill you right on up. A good bit of the fiber comes from the chickpea pasta, which I adore; if you sub traditional pasta, the fiber will go down considerably. I love the bite of broccoli rabe—and, luckily, so do my kids—but if you’re not a fan of its bitter edge, you can sub broccolini or broccoli.

ingredients:

  • Cooking spray

  • 8 oz. sweet Italian sausage

  • 2 Tbsp. extra-virgin olive oil

  • 1 cup vertically sliced white or yellow onion

  • 1/4 to 1/2 tsp. crushed red pepper

  • 1 lb. broccoli rabe (rapini), trimmed

  • 8 oz. uncooked chickpea pasta—rigatoni, penne, cavatappi, or rotini

  • 5 garlic cloves, thinly sliced

  • 3 Tbsp. tomato paste

  • 1/2 tsp. kosher salt

  • 1 oz. Parmigiano-Reggiano cheese, grated (about 1/4 cup)


instructions:

  1. Bring a large pot of water (such as a Dutch oven or small stockpot) to a boil. 

  2. While water comes to a boil, heat a large skillet (not nonstick) over medium-high heat. Coat pan with cooking spray. Add sausage; cook, stirring frequently to crumble, until browned and cooked through (about 6 minutes). Remove sausage from pan, reserving drippings. 

  3. Reduce heat to medium-low. Add oil to drippings in pan; swirl to coat. Add onion and red pepper to pan; cook, stirring occasionally, until onion is very soft (about 10 minutes).

  4. Meanwhile, add broccoli rabe to boiling water; cook 2 minutes. Remove from water with tongs (reserving boiling water), place in a colander, and rinse with cold water until cool. Drain well; cut into 2-inch pieces. Add pasta to boiling water; cook until al dente (about 8 minutes). Be careful not to overcook, as chickpea pasta falls apart when cooked too long. Reserve 1 1/4 cups pasta water; drain pasta.

  5. Add garlic to onion mixture in pan; cook 2 minutes. Add tomato paste; cook, stirring constantly, for 1 minute. Stir in 3/4 cup pasta water and salt. Add pasta, sausage, and broccoli rabe; stir very gently to combine. Stir in additional pasta water as needed to form the sauce. Sprinkle with cheese.

NOTES:

Calories 409; Fat 17g (sat 6g); Protein 30g; Carb 41g; Fiber 13g; Sugars 7g (added sugars 0g); Sodium 654mg
Created using The Recipes Generator

Shrimp and Vegetable Curry with Cauliflower Rice

IMG_1150.jpg
Yield: 4 servings (serving size: 3/4 cup cauliflower rice, 4 oz. shrimp, & 3/4 cup sauce)

Shrimp and Vegetable Curry with Cauliflower Rice

prep time: 8 minscook time: 12 minstotal time: 20 mins

How about a 20-minute dinner that tastes like it took an hour? That's loaded with vegetables, too? This recipe delivers all that and is mild enough—and creamy enough—to satisfy everyone at the table. My kids hugged me after eating this, and I'll take that as pretty darn high praise! Do take note that it's a bit of a splurge. Though the calories are low (under 400 calories), the saturated fat is on the high side; try to balance out the rest of your day with food that's lower in sat fat. I do think it's worth it to go full fat with the coconut milk here for the most satisfying, creamy texture. Just think of it as a splurge, something to enjoy every now and then. Or hell, maybe once a week! And don't forget to squeeze on a little lime juice before tucking in; it's the perfect finishing touch, brightening the whole bowl.

ingredients:

  • 2 Tbsp. canola oil, divided
  • 1 cup vertically sliced yellow onion
  • 1 medium zucchini, chopped
  • 5 garlic cloves, minced and divided
  • 1 Tbsp. red curry paste (I used Thai Kitchen)
  • 1 tsp. brown sugar
  • 2 tsp. fish sauce
  • 1 (13.6-oz.) can coconut milk (full-fat)
  • 1 lb. raw large shrimp, peeled and deveined
  • 6 oz. fresh baby spinach
  • 1 lb. riced cauliflower (I used fresh, not frozen)
  • 1/4 cup chopped fresh cilantro, plus more for garnish
  • Thinly sliced Fresno or red jalapeño peppers (optional)
  • Lime wedges

instructions:

  1. Heat a large skillet or sauté pan over medium-high heat. Add 1 tablespoon oil; swirl to coat. Add onion and zucchini; sauté 3 minutes. Add half of garlic; sauté 2 minutes. Add curry paste; cook 30 seconds, stirring constantly. Stir in sugar, fish sauce, and coconut milk; bring to a simmer.
  2. Add shrimp; cover and cook until shrimp are almost done, about 2 minutes. Add spinach; cover and cook until spinach wilts, about 2 minutes. Stir gently to combine.
  3. Meanwhile, heat another large skillet over medium-high heat. Add remaining 1 tablespoon oil; swirl to coat. Add cauliflower and remaining half of garlic; sauté until crisp-tender, about 4 to 5 minutes. Stir in chopped cilantro. Divide cauliflower rice evenly among 4 bowls; top evenly with shrimp and sauce. Top with Fresno/jalapeño slices and additional cilantro, if desired. Serve with lime wedges.

NOTES:

Calories 376; Fat 21g (sat 13g); Protein 33g; Carb 14g; Fiber 5g; Sugars 9g (added sugars 1g); Sodium 766mg
Created using The Recipes Generator

Dijon Beef Stew

IMG_0390.jpeg

This stew is basically the love child of two of my favorite recipes: Cooking Light’s Beef Daube Provençal and The New York Times’s Dijon and Cognac Beef Stew. It will make your house smell heavenly and have your family singing your praises. It’s a very easy recipe, too, and cooks hands-free for a few hours so you can tend to other things. This makes it great for a dinner party, as you can get the table set and the sides—I like to serve it with mashed potatoes and a bright, bracing salad—pulled together, not to mention yourself.

Yield: 8 servings (serving size: about 1 cup)

Dijon Beef Stew

prep time: 30 minscook time: 2 hour and 30 minstotal time: 2 hours and 60 mins

This is one of those cozy, comforting stews that will take the chill of any winter night. It's beefy, absurdly savory, and full of long-cooked flavor. I like to serve it over mashed potatoes (as shown); it's also fantastic ladled over polenta, egg noodles, grilled sourdough bread, or a baked potato. You can make this in a slow cooker—starting with step 4 and cooking on LOW for about 6 hours—but I promise this tastes better when you cook it in the oven. I don't know why, but it's true! The slow cooker version is still pretty darn good, but just know that the oven version is even better.

ingredients:

  • 2 Tbsp. olive oil, divided
  • 2 lb. boneless chuck roast, trimmed and cut into 1 1/2-inch pieces
  • 2 cups chopped onion
  • 2 cups chopped carrots
  • 8 garlic cloves, smashed
  • 2 Tbsp. tomato paste
  • 1 cup dry red wine
  • 1 cup unsalted beef stock
  • 1/3 cup Dijon mustard
  • 1 tsp. kosher salt
  • 1 tsp. freshly ground black pepper
  • 8 oz. cremini mushrooms, quartered (or halved if they're small)
  • 5 large thyme sprigs
  • 2 dried bay leaves
  • Chopped fresh parsley (optional)

instructions:

  1. Preheat oven to 300°F.
  2. Heat a Dutch oven over medium-high heat. Add 1 tablespoon oil to pan; swirl to coat. Add half of beef; cook, turning occasionally, until well browned on all sides, about 8 minutes. Remove beef from pan; repeat procedure with remaining 1 tablespoon oil and remaining beef. 
  3. Add onion and carrots to pan; sauté 3 minutes. Add garlic; sauté 1 minute. Add tomato paste; cook 1 minute, stirring constantly until vegetables are coated. Add wine; cook until wine is reduced by half, about 3 minutes. Stir in beef, stock, mustard, salt, pepper, mushrooms, thyme, and bay leaves. 
  4. Cover and bake at 300°F until beef is very tender, about 2 1/2 hours. Garnish stew with parsley, if desired.

NOTES:

Calories 313; Fat 16g (sat 6g); Protein 23g; Carb 9g; Fiber 2g; Sugars 3g (added sugars 0g); Sodium 516mg
Created using The Recipes Generator

White Chicken Chili with Poblanos

IMG_0876.jpeg

A big pot of chili just screams comfort and goodness. But you don’t always have hours to devote to one, y’know? This chicken chili, with a broth that’s both, well, brothy and slightly creamy, takes only a little more than a half-hour to make. It’s deeply savory and full of flavor, thanks to a few well chosen ingredients. The broth gets its body from pureed beans (it’s not thickened with flour), so it’s gluten free. You’ll be happy you made it whether it’s a cold, damp night or a warm evening—it’s an all-weather chili!

Yield: 8 servings (serving size: about 1 1/3 cups)

White Chicken Chili with Poblanos

prep time: 10 minscook time: 25 minstotal time: 35 mins

This hearty pot of chili comes together from start to finish in only 35 minutes, thanks to a trifecta of smart convenience products: rotisserie chicken, canned beans, and bottled tomatillo salsa. The salsa gives the broth loads of flavor, and all you have to do is twist open the lid. Know that poblano peppers can be tricky: Sometimes they’re as mild as bell peppers, and other times they’re hotter than jalapeños. If yours is particularly spicy (be brave and touch a piece to your tongue), use just one pepper—or go for it with two if you’re a hothead.

ingredients:

2          Tbsp. canola oil

2          cups chopped white onion

2          poblano peppers, seeded and chopped

6          large garlic cloves, minced

2          tsp. ground cumin

1          tsp. dried oregano

4          cups unsalted chicken stock (I used Swanson), divided

1          cup bottled tomatillo salsa (I used Frontera)

1          tsp. kosher salt

1          tsp. freshly ground black pepper

3          (15-oz.) cans unsalted cannellini beans, rinsed, drained, and divided

4          cups shredded boneless, skinless rotisserie chicken, white and dark meat (about 1 lb., 1 small rotisserie chicken)

3/4      cup thinly sliced radishes

1/2      cup thinly sliced green onions

2          ripe peeled avocados, thinly sliced or chopped

1          jalapeño pepper, thinly sliced (optional)

instructions:

1. Heat oil in a large Dutch oven over medium heat. Add onion and poblanos; cook 5 minutes, stirring occasionally. Add garlic; cook until onion is tender, stirring frequently, about 4 minutes. Stir in cumin and oregano; cook 1 minute, stirring constantly.


2. Stir in 3 1/2 cups chicken stock, salsa, salt, black pepper, and bay leaves; bring to a boil. Reduce heat, and simmer 10 minutes. 


3. Meanwhile, combine remaining 1/2 cup stock and 1 can of beans (about 1 1/2 cups) in a blender; process until smooth. Stir bean puree and remaining 2 cans of beans into pan; return to a simmer. Add chicken; simmer 5 minutes. 


4. Ladle about 1 1/3 cups chili into each of 8 bowls; top servings evenly with radishes, green onions, avocados, and jalapeño, if desired.

NOTES:

Calories 357; Fat 12g (sat 2g); Protein 30g; Carb 35g; Fiber 11g; Sugars 2g (added sugars 0g); Sodium 653mg
Created using The Recipes Generator

Lime Shortbread with Cardamom Glaze

IMG_0839.jpg

Well, this post is short, sweet, and simple. No step-by-step photos or instruction needed! The cookies are easy to make and pretty hefty in size; one is plenty big to satisfy a sweet craving.

Yield: 24 cookies

Lime Shortbread with Cardamom Glaze

prep time: 2 hourcook time: 22 minstotal time: 2 hours and 22 mins

This simple slice-and-bake cookie gets all gussied up for the holidays with red and green accents from pomegranate and pistachios. The pomegranate is completely optional and will shorten the shelf life of the cookies, but boy is it pretty! I love kosher salt for these cookies. It gives you delicious little pockets of salty goodness throughout—because a one-note sweet treat without a little salt for balance is, well, flat and boring. Please note that there is no egg in this dough; that's not a mistake. This gives the cookies the most wonderful "short" texture that's absolutely irresistible.

ingredients:

Cookies:
  • 9 oz. whole-wheat pastry flour (about 2 1/4 cups)
  • 1/2 cup powdered sugar
  • 1/4 cup cornstarch
  • 1/2 tsp. kosher salt
  • 1/2 cup unsalted butter, softened
  • 6 Tbsp. canola oil
  • 1/4 cup granulated sugar
  • 1 1/2 tsp. vanilla extract
  • 1 tsp. finely grated lime zest (from 1 lime)
Glaze and Toppings:
  • 3/4 cup powdered sugar
  • 1 1/2 tsp. meringue powder (this helps the glaze set up firmly; find it at craft stores)
  • 1/4 to 3/8 tsp. ground cardamom
  • 4 tsp. water (FYI: I tried this with lime juice and it was just too much)
  • 2 Tbsp. finely chopped pistachios
  • 2 Tbsp. pomegranate arils (optional)

instructions:

  1. To prepare cookies, combine flour, 1/2 cup powdered sugar, cornstarch, and salt, stirring with a whisk.
  2. Place butter in a large bowl; beat with a mixer on medium speed until creamy (about 1 minute). Add oil, granulated sugar, vanilla, and lime zest; beat on medium speed until well blended (about 2 minutes). 
  3. Divide dough in half. Roll each half into a 5-inch-long log. Wrap dough logs separately in plastic wrap; chill for 30 minutes.
  4. Preheat oven to 325°F.
  5. Remove dough logs from refrigerator, and remove plastic wrap. Cut each dough log into 12 slices (reshape log to keep round shape as needed). Arrange cookies on 2 baking sheets lined with parchment paper. Bake at 325°F for 22 - 25 minutes or until cookies are set and barely starting to brown around the edges. Cool cookies completely on pans.
  6. To prepare the glaze, combine 3/4 cup powdered sugar, meringue powder, and cardamom in a small bowl. Add water, and stir until smooth (glaze will be thin). Spread glaze evenly over cookies; sprinkle evenly with pistachios and pomegranate arils, if desired. Let cookies stand at room temperature until glaze is set, about 1 hour. 
  7. If you used pomegranate arils, store the cookies in an airtight container in the fridge for up to 2 days. If you omitted the pomegranate, store the cookies in an airtight container at room temperature for up to 5 days.

NOTES:

Calories 150; Fat 8g (sat 3g); Protein 1g; Carb 19g; Fiber 2g; Sugars 8g (added sugars 8g); Sodium 25mg
Created using The Recipes Generator

Chocolate-Cinnamon Sugar Cookies

IMG_0832.jpg

I just love these spiced chocolate sugar cookies! They taste like Mexican chocolate, with cinnamon warming the sweet chocolate notes. I use just a little bit of cocoa for more of a milk chocolate flavor than a dark chocolate one. See the notes below the recipe card for ingredient/decorating tips.

Yield: 40 cookies (I got 45, but let's say 40 to be safe)

Chocolate-Cinnamon Sugar Cookies

prep time: 2 hourcook time: 20 minstotal time: 2 hours and 20 mins

Since no one in my family likes gingerbread cookies (except me), I decided to create some cookies that look like them and have a little bit of spice to jazz them up. The flavor is reminiscent of Mexican chocolate, with the zip of cinnamon perking up sweet chocolate notes (I use just a little bit of cocoa to create more of a milk chocolate vibe than a dark chocolate flavor).

ingredients:

Cookies
  • 9 oz. whole-wheat pastry flour (about 2 1/4 cups)
  • 1/4 cup unsweetened cocoa powder
  • 1 1/2 tsp. ground cinnamon
  • 1/2 tsp. kosher salt
  • 1/2 cup unsalted butter, softened
  • 1/4 cup canola oil
  • 3/4 cup granulated sugar
  • 1 tsp. vanilla extract
  • 1 large egg
Icing (This will make double of what you'll use to decorate the cookies, but you'll want extra to play with for coloring and playing around with.)
  • 2 cups powdered sugar
  • 4 tsp. meringue powder (see note below)
  • 3 1/2 to 4 1/2 Tbsp. water
  • 1/2 tsp. vanilla extract
  • Food coloring (optional)

instructions:

  1. To prepare cookies, combine flour, cocoa, cinnamon, and salt, stirring with a whisk.
  2. Place butter in a large bowl; beat with a mixer at medium speed until creamy (about 2 minutes). Add oil; beat at medium speed until well combined. Add granulated sugar and 1 teaspoon vanilla; beat until fluffy (about 1 1/2 minutes). Beat in egg. Add flour mixture; beat on low speed until just combined.
  3. Divide dough in half. Roll each half between sheets of plastic wrap to a thickness between 1/8 inch and 1/4 inch (dough will be soft). Place dough, still between plastic wrap, on a baking sheet, and place in freezer for 20 minutes or until firm.
  4. Preheat oven to 350°F.
  5. Remove dough from freezer. Remove plastic wrap from top of 1 dough half. Working quickly, cut dough with 2- to 3-inch cutters of desired shapes. Arrange cookies on a baking sheet lined with parchment paper. Repeat procedure with remaining dough half, placing on another baking sheet lined with parchment paper. Reroll scraps and refreeze to firm up dough. Cut out more shapes until you have 40 to 45 cookies. Bake at 350°F for 10 minutes or until firm and starting to slightly darken around the edges. Cool on baking sheets on a wire rack for 2 minutes. Transfer cookies directly to wire rack to cool completely, about 30 minutes.
  6. To prepare icing, combine powdered sugar and meringue powder in a large bowl. Add 3 1/2 tablespoons water and 1/2 teaspoon vanilla. Beat with a mixer on low speed until just moistened (about 20 seconds); beat on high speed until thick, bright white, and smooth (about 5 minutes). Beat in additional water, 1/2 teaspoon at a time, if needed, to reach desired consistency. Stir in food coloring (see notes below) if desired. Spread or pipe icing evenly over cookies. Let stand at room temperature until icing is completely set (about 1 to 2 hours). Store in an airtight container for up to 5 days.

NOTES:

Calories 96; Fat 5g (sat 2g); Protein 1g; Carb 13g; Fiber 1g; Sugars 7g (added sugars 7g); Sodium 19mg
Created using The Recipes Generator

IMG_0783.jpg

Another critical ingredient for these cookies is meringue powder, which helps the icing set up hard so that you can stack and package the cookies with no worries of destroying your beautiful decorations. You can find it in the baking section of craft stores.
IMG_0809.jpeg

One of my favorite ingredients ever is whole-wheat pastry flour. I’ve touted it before, and I’ll do so here again! Its fine texture works beautifully in all types of baking recipes, and it allows me to make 100% whole-grain treats with great texture. Here’s the kind I use (the house brand from Whole Foods).

Now for the fun part, the decorations. Piping is easy and goes quickly. You can use a piping bag with a #1 or #2 tip (which is what I did), or use a zip-top plastic bag and cut a tiny hole in one corner to pipe from. My piping skills are not very good, but the cookies still look pretty great!

IMG_0819.jpeg

For the trees, I mixed up some natural food coloring (India Tree brand—shown in the photo on the right) to create a deep green color. Yellow + blue = green. To create colored icing, I simply spoon some of the white icing into a small bowl or ramekin and mix in the color with a butter knife. I then use the knife to spread the icing onto each cookie. You can pipe the icing, too, but the knife method works really well for me.

I then gathered up round sprinkles, tiny nonpareils, and edible silver dragées for the designs. You’ll want to spread the green icing over the entire surface of the cookie and then apply your toppings while the icing is still wet. You can apply in either in a random pattern or—my favorite—with tweezers to create strings of lights. Whether you’re a white lights person or a colored lights person, you can make your tree cookies reflect your style.

IMG_0813.jpeg
IMG_0824.jpeg
IMG_0822.jpeg
IMG_0823.jpeg

For the reindeer, I used brown gel food coloring (not natural food coloring, sorry) to create a lighter doe-like color for the deer. I felt that the natural chocolate color was too dark. I spread the brown-tinted icing over the entire surface of the deer, and then each deer got a collar of either small nonpareils or larger round sprinkles, a blue nonpareil for the eye, and a red round sprinkle for a Rudolph nose.

IMG_0810.jpeg
IMG_0812.jpeg
IMG_0825.jpeg

Finally, for the stockings, I started off in a hilarious way. I had some gorgeous fluffy purple glitter that made amazingly beautiful cookies. But then I realized that this purple glitter was not edible—it had been placed in the wrong crafting box! So that stunk… I then proceeded with new stockings. First, I decorated the cuff with white icing that I topped, when still wet, with white sparkling sugar. Once that dried, I covered the rest of the stocking with white icing and topped with red or green sparkling sugar. For the others, I let the white icing dry completely and then brushed on copper and silver luster dust. (I have some eyeshadow brushes that came free with purchase that are perfect for this. No, I never used them with cosmetics. They are for food only!)

IMG_0821.jpeg
IMG_0817.jpeg

You can find all of the decorating supplies at craft stores. They’re a great investment that you can use year after year (I’ve had that luster dust for maybe five years.)

My last bits of advice when you’re decorating Christmas cookies:

  1. If you want to decorate with your kids, you have to let them do their own thing. Let go of your own expectations and let them have fun. (If you want gorgeous cookies for teacher gifts, maybe decorate by yourself after the kiddos go to bed.)

  2. Allow yourself plenty of time to decorate. If this needs to come together in an hour, you’ll drive yourself crazy.

  3. Make sure you have plenty of space to allow the cookies to dry. Once decorated, I place them on either sheet pans or these large plastic platters I have and move them out of reach of my big dog. He has helped himself to food on the table when I’ve turned my back.

  4. Get creative and have fun!

Cranberry-Orange Bread with Salted Pecan Streusel

IMG_0670.jpeg

Cranberry-orange bread always feels like a holiday treat just bursting with winter fruit flavor. It’s a lovely treat to make for yourself or to offer as a gift to teachers, friends, and family. My version is healthier than many you’ll find, made with whole-grain flour and less sugar. See below for a few tips and how-to photos.

Yield: 12 servings

Cranberry-Orange Bread with Salted Pecan Streusel

prep time: 15 minscook time: 50 minstotal time: 65 mins

I adore cranberry-orange bread, but it's often swimming in sugar and made with refined white flour. I worked on this healthier version and absolutely love it. It's moist (sorry, but that's the best word for it!), full of citrus flavor and intermittent pops of cranberry tartness, and crowned with the most delicious salted pecan streusel. Here's the thing, though (yep, there's a thing): I love that streusel so much that I wanted there to be plenty on top of the bread. It's a little heavy, so it sinks down into the batter a bit and prevents the bread from doming. I tried the bread with less streusel and just wasn't as happy with it. So sunken streusel it is!

ingredients:

Bread:
  • 8 oz. whole-wheat pastry flour (about 2 cups)
  • 1 1/2 tsp. baking powder
  • 1/2 tsp. baking soda
  • 1/2 tsp. kosher salt
  • 2/3 cup granulated sugar
  • 1 Tbsp. grated orange zest (from 1 large navel orange)
  • 1/2 cup fresh orange juice (from 1 large navel orange)
  • 1/3 cup whole buttermilk
  • 3 Tbsp. canola oil
  • 1 tsp. vanilla extract
  • 1 large egg, lightly beaten
  • 1 cup chopped fresh or frozen, thawed cranberries (1 cup whole cranberries = about 1 cup chopped)
Streusel:
  • 1/4 cup old-fashioned rolled oats
  • 1/4 cup chopped pecans (no need to pre-toast; they'll toast on top of the bread as it bakes)
  • 3 Tbsp. light brown sugar
  • 2 Tbsp. salted butter, melted
  • 1/4 tsp. kosher salt

instructions:

  1. Preheat oven to 350°F. Line an 8 x 4–inch loaf pan with parchment paper (see tip below). 
  2. To prepare the bread, combine flour, baking powder, baking soda, and salt in a large bowl; stir with a whisk to combine.
  3. Combine granulated sugar, orange zest (it's easier to zest the orange while it's whole, before you cut it and squeeze out the juice), orange juice, buttermilk, oil, vanilla, and egg in a medium bowl; stir well with a whisk to combine. Add wet mixture to flour mixture; stir with a silicone spatula to combine. Fold in cranberries. Spoon batter into prepared loaf pan. 
  4. To prepare streusel, combine oats, pecans, brown sugar, butter, and salt; stir well to combine. Sprinkle evenly over batter.
  5. Bake at 350°F until bread springs back when pressed in center and a wooden pick comes out clean, about 50 - 55 minutes. Cool in pan for 10 minutes. Remove from pan (with parchment paper) and cool on a wire rack.
  6. For mini loaves (I used 3 [6 x 2 1/2–inch] paper baking molds), spoon about 1 cup batter into each of 3 molds. Divide streusel evenly over loaves. Bake at 350°F until bread springs back when pressed in center and a wooden pick comes out clean, about 30 minutes. Cool in paper molds. 

NOTES:

Calories 209; Fat 7g (sat 2g); Protein 3g; Carb 33g; Fiber 3g; Sugars 16g (added sugars 14g); Sodium 144mg
Created using The Recipes Generator

When prepping the loaf pan, line it with parchment paper to make removal much easier. Place the paper down on a surface, place the pan in the middle, and make diagonal cuts from each corner of the paper to the corner of the pan.

IMG_0638.jpeg

This makes it easier to fit the paper into the pan, firmly into the corners.

IMG_0640.jpeg

Next, I call for whole-wheat pastry flour here. It’s an ingredient I absolutely love and use all the time. It’s finer in texture than whole-wheat flour or white-wheat flour, making it ideal for baking projects. Here’s the kind I use:

IMG_0783.jpeg

Last little tidbit. Please take note of my words above about the streusel. There’s a good bit of it.

IMG_0643.jpeg

And that gives you excellent coverage over the batter:

IMG_0645.jpeg

Trust me, you wouldn’t want any less! The bread is delicious just as it is. It’s just a little less poofy, that’s all.

IMG_0646.jpeg

Slow-Cooker Pork with White Beans and Kale

IMG_0757.jpeg

Well, we’re officially in the busiest month of the year—or at least it’s the busiest for me and every other human I know. Among all the fun social commitments, errand-running, holiday shopping, cookie baking, and cramming in of end-of-year work that just has to get done, there’s little time for everyday cooking. And that’s where the good ol’ slow cooker comes in handy. To be completely honest, I’m not the biggest fan of the slow cooker … until life gets insane enough for me to admit that it really is pretty darn useful. Let it do the work for you, making this comforting, delicious, nutritious (check out that fiber!) meal that will feed you and your family for multiple nights. There’s very little prep involved, and then the slow cooker just does its thing while you go about doing your thing. The pork ends up meltingly tender, and the beans are the creamiest ever. If only everything in December could be this easy and this satisfying!

Yield: 12 (serving size: about 4 oz. pork and 2/3 cup bean mixture)

Slow-Cooker Pork with White Beans and Kale

prep time: 14 minscook time: 7 hour and 10 minstotal time: 7 hours and 24 mins

When your week is insanely busy, you need a meal that will cook itself while you're at work—and then feed you and your family another couple nights of delicious leftovers. This is that meal. It's dead simple, delivering supreme comfort with very little effort. The beans, which go into the slow cooker dry (because who can remember to soak them ahead?) absorb all the delicious porky flavors and cook up to an incredibly creamy texture. Enjoy leftovers as they are, or mash the beans with a little hot sauce and use as a tostada topping or taco filling with the pork; just add salsa to perk up the flavor.

ingredients:

  • 2 1/2 tsp. kosher salt, divided
  • 1 tsp. black pepper
  • 1 tsp. ground cumin
  • 1 tsp. ground coriander
  • 1 (4 1/2-lb.) bone-in pork shoulder roast (Boston Butt), trimmed (for me, the trimmed weight was 4 lb.)
  • 2/3 cup water
  • 1 lb. dried Great Northern beans (no need to presoak)
  • 4 cups unsalted chicken stock (1 [32-oz.) carton)
  • 6 garlic cloves, peeled and smashed
  • 2 oregano sprigs (or 1/2 tsp. dried oregano)
  • 2 bay leaves
  • 1 dried ancho chile, stemmed (optional)
  • 1 large bunch curly kale (about 12 oz.), stemmed and torn into pieces

instructions:

  1. Heat a large nonstick skillet over medium-high heat. Combine 1 teaspoon salt, pepper, cumin, and coriander. Rub over all sides of pork. Add pork to pan; cook until well browned, turning occasionally to brown all sides, about 12 minutes. Place pork in a slow cooker. Add water to hot skillet, scraping bottom of pan to release browned bits. Pour water over pork.
  2. Arrange beans around pork in slow cooker. Pour chicken stock over beans. Add garlic, oregano, bay leaves, and chile, if using, to slow cooker. Cover and cook on LOW until pork and beans are very tender, about 7 to 8 hours. Remove and discard bay leaves and oregano sprigs. (You can chop or mash the ancho and stir into the beans if desired.)
  3. Increase slow cooker heat to HIGH. Pile kale on top. Cover and cook 10 minutes or until kale wilts. (I like my kale a little chewy and still bright green; if you like it more tender, you'll need to cook it longer.) Sprinkle kale with remaining 1 1/2 teaspoons salt; gently stir to combine with beans. 

NOTES:

Calories 435; Fat 19g (sat 7g); Protein 38g; Carb 27g; Fiber 9g; Sugars 2g (added sugars 0g); Sodium 579mg
Created using The Recipes Generator

This recipe is so simple that there’s not much to show, step- or technique-wise. I do recommend buying a bone-in pork roast, as the bone always seems to add more flavor and helps to keep the pork moist. And please, please, please brown it before it goes into the slow cooker. That step builds deep, savory flavor and is more than worth the few minutes it takes. Remember, brown = flavor. I don’t add any oil to the skillet when I brown the roast (you really don’t need it).

IMG_0680.jpeg

As for the beans, they go into the slow cooker dry. They cook to creamy perfection over the long, slow simmer, picking up all the yummy pork flavor, as well as that of the broth and the other flavorings:

IMG_0681.jpeg

Well, I forgot to show the garlic, but garlic goes in with the beans, along with bay leaves, oregano sprigs (or dried oregano), and an optional ancho chile. I love what the ancho adds—no real heat but instead richness and depth, with a hint of bitterness. I fished it out before dishing this up for the kids. But I sort of mashed it into my serving. Delicious!

IMG_0683.jpeg

That’s it! That’s all it takes to make a warm, comforting, hearty, big-batch meal that will pull you through the busiest December day.

Herby Buttermilk Ranch Dressing

IMG_0622.jpeg

Everyone needs a good recipe for great ranch dressing, right? This one is easy, fresh, and packed with flavor. It’s really good served very cold—either draped over crisp greens or as a dip for veggies. My current favorite way to have it is shown above: a simple iceberg (yes!) salad with sliced grape tomatoes and bacon. Simple can be so good.

Yield: 8 servings (serving size: 2 tablespoons)

Herby Buttermilk Ranch Dressing

prep time: 10 minscook time: total time: 10 mins

Confession: I like ranch dressing. Not the bottled stuff, which I think is pretty bland. No, I mean homemade buttermilk ranch. I like it loaded with fresh herbs and with a little bite from fresh garlic, which is what makes it so good. I also like it served very cold over equally cold crisp greens like romaine (when it's not being recalled), Little Gem lettuce, or iceberg lettuce, which I've recently rediscovered. The recipe here is for the dressing alone; the salad shown is just a serving suggestion. You might want to go ahead and double the recipe; it's a good thing to keep on hand.

ingredients:

  • 1/2 cup whole buttermilk
  • 1/2 cup mayonnaise (I use Duke's; I'm Southern...)
  • 2 Tbsp. chopped fresh chives
  • 1 Tbsp. chopped fresh dill
  • 1 Tbsp. apple cider vinegar
  • 2 tsp. chopped fresh thyme
  • 1/2 tsp. kosher salt
  • 1/2 tsp. freshly ground black pepper
  • 1 small garlic clove, grated on a Microplane

instructions:

  1. Place all ingredients in a medium bowl; whisk until well combined. I like to chill mine until very cold before serving, about an hour or so.

NOTES:

Calories 111; Fat 12g (sat 2g); Protein 1g; Carb 1g; Fiber 0g; Sugars 1g (added sugars 0g); Sodium 183mg
Created using The Recipes Generator